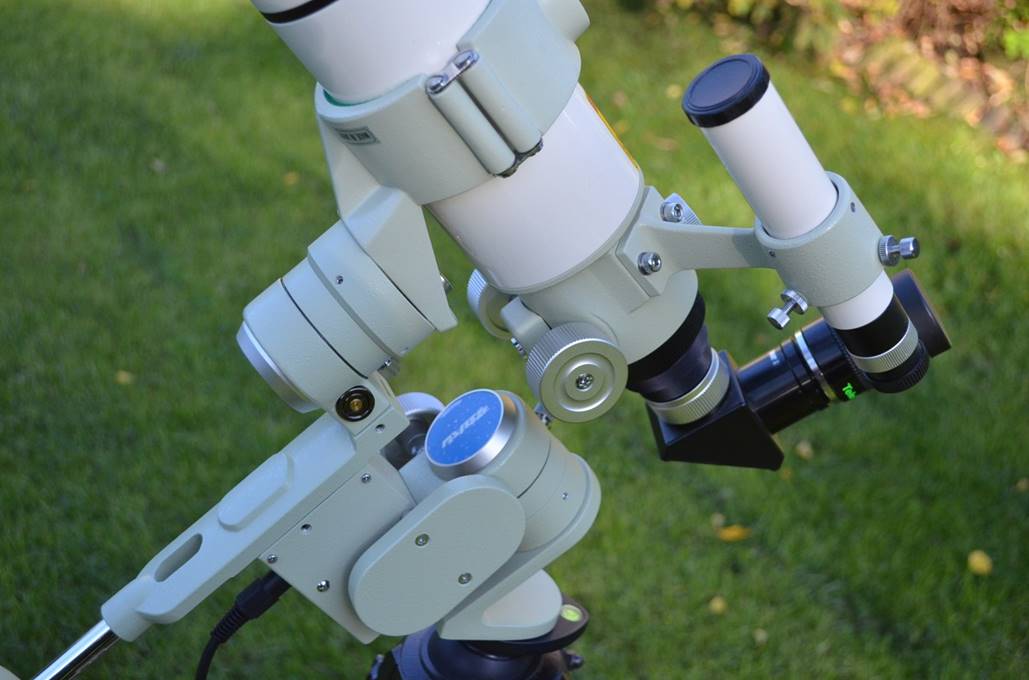
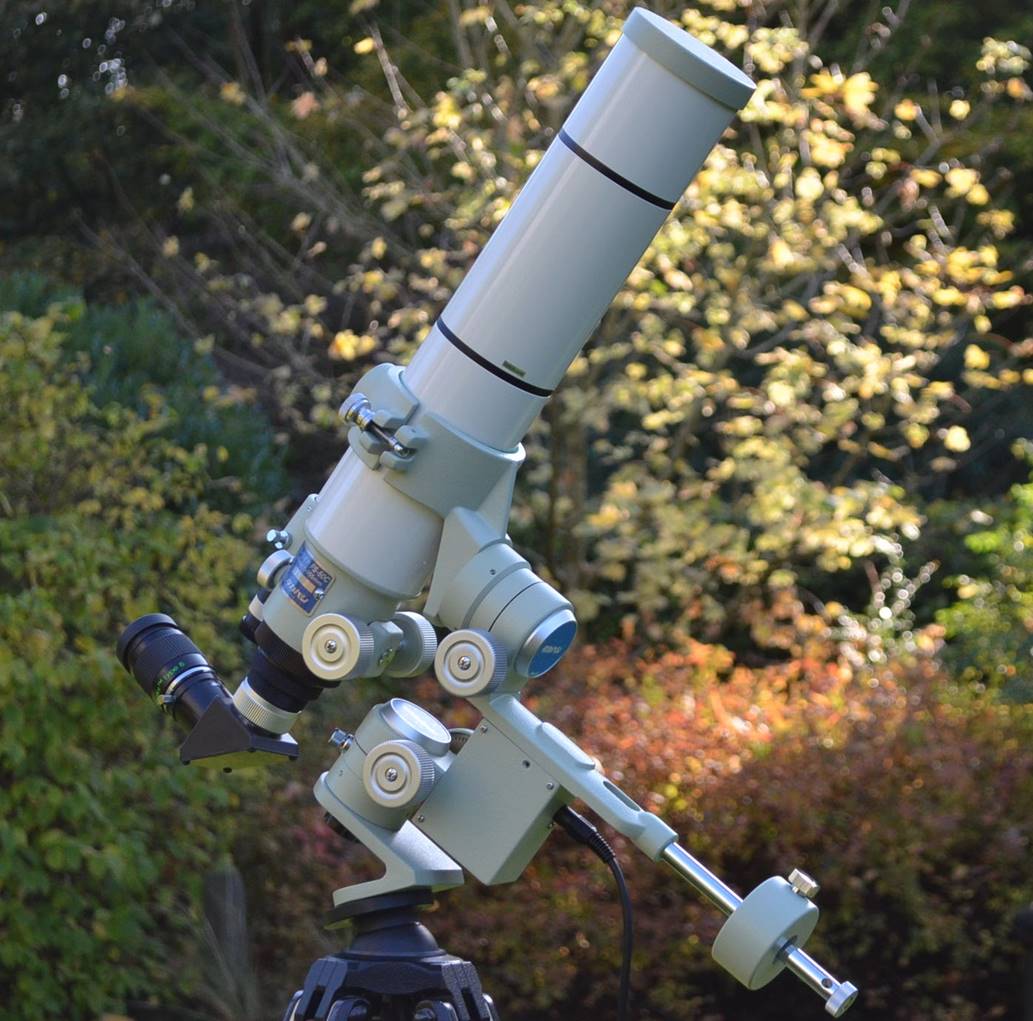
Takahashi Teegul Sky Patrol SP3 Mount Review

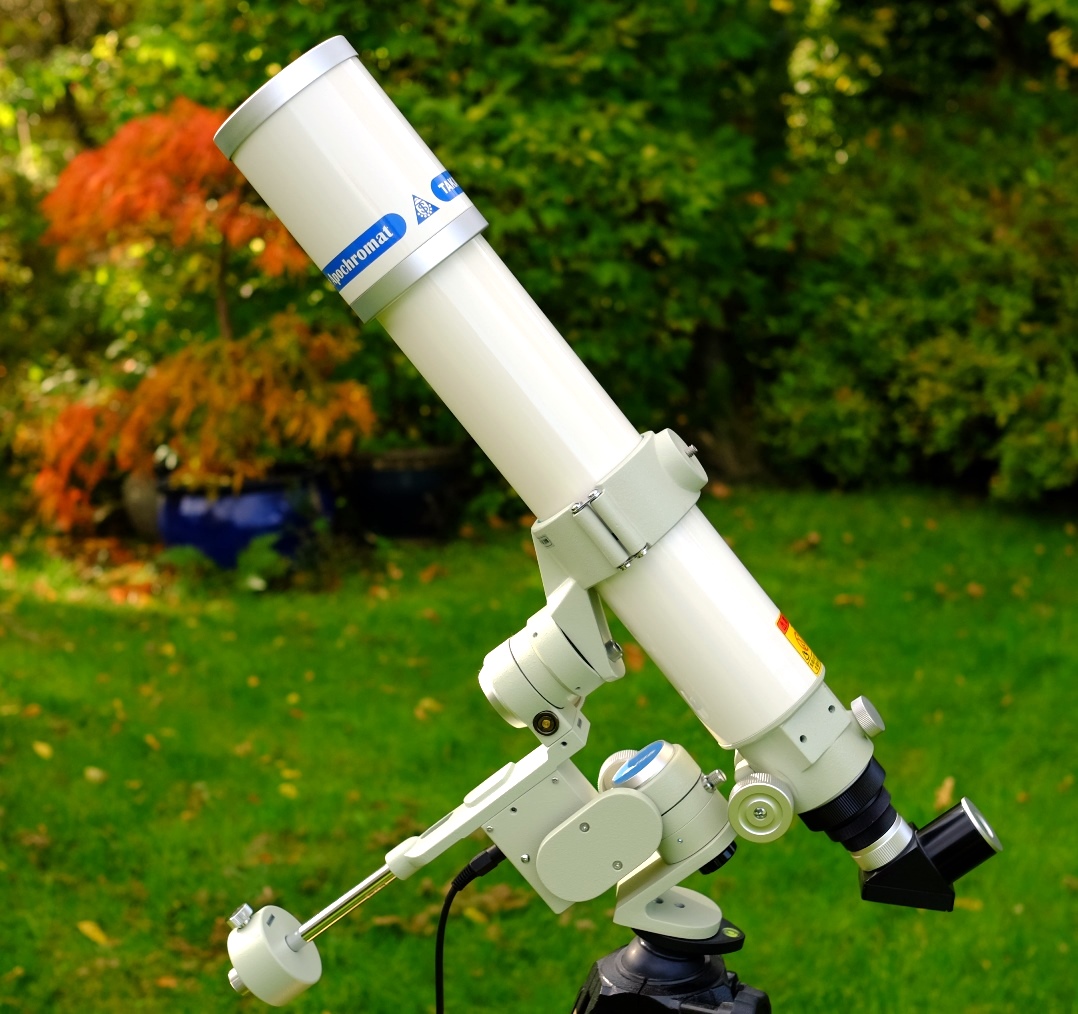
Takahashi Teegul SP3 in fork mode with FS-60.
Tele Vue’s diminutive TV-60, mounted on their push-pull
TelePod mount, was one of my favourite grab-n-go setups - so small and light
you can pick it up with one hand and just walk-out to view.
But for me there was a problem and I had an epiphany one
night, trying to get a good view of Mars with an alt-az
mounted refractor: for the kind of
viewing I do push-pull alt-az mounts are a pain.
At low powers they’re great, but at high-powers you are forever pushing
the mount around trying to get that planet back in view.
What’s needed, of course, is an equatorial mount. No
problem! There are loads of those around. But I didn’t need goto, just a driven RA axis to follow the sky and manual
slow-motion controls. I also wanted it super-small and portable.
One such was Takahashi’s now-discontinued Teegul Sky
Patrol. The Teegul SP is tiny and very light (about 2Kg for the basic set), but
also breaks down into very small chunks for travel, making a perfect
eclipse-chasers’ mount.
I don’t do many mount reviews, but the Teegul is worth
it if only because there seems to be some confusion as to how it’s
actually meant to work (the guy I bought mine from clearly didn’t get it
at all and had given up with the mount unused); it also has a lot of options
and is arguably a bit too clever for its own good. I’ll try to get to the
bottom of all that here.
Note: A big
thanks to Peter Barker for correcting some of my mistakes and supplying some
images of accessories I don’t have.
Design and Build
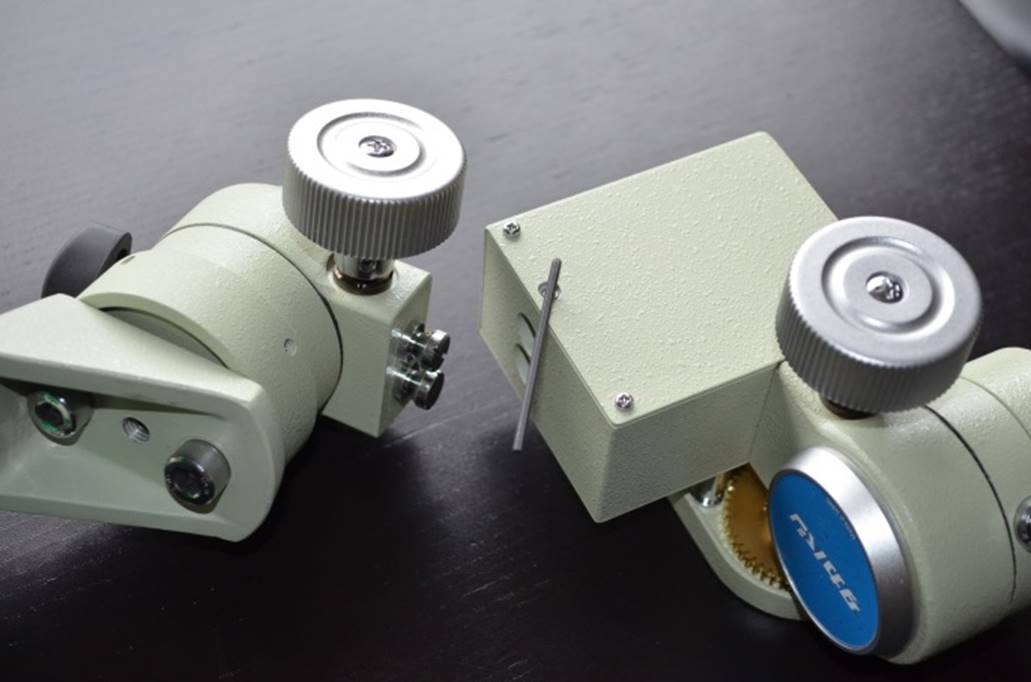
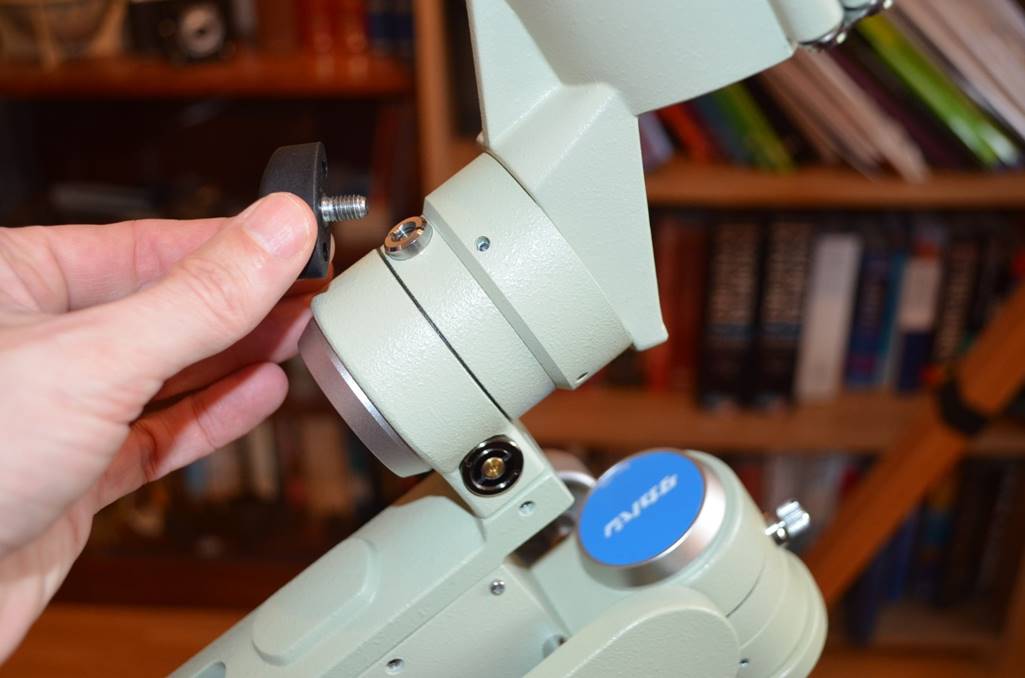
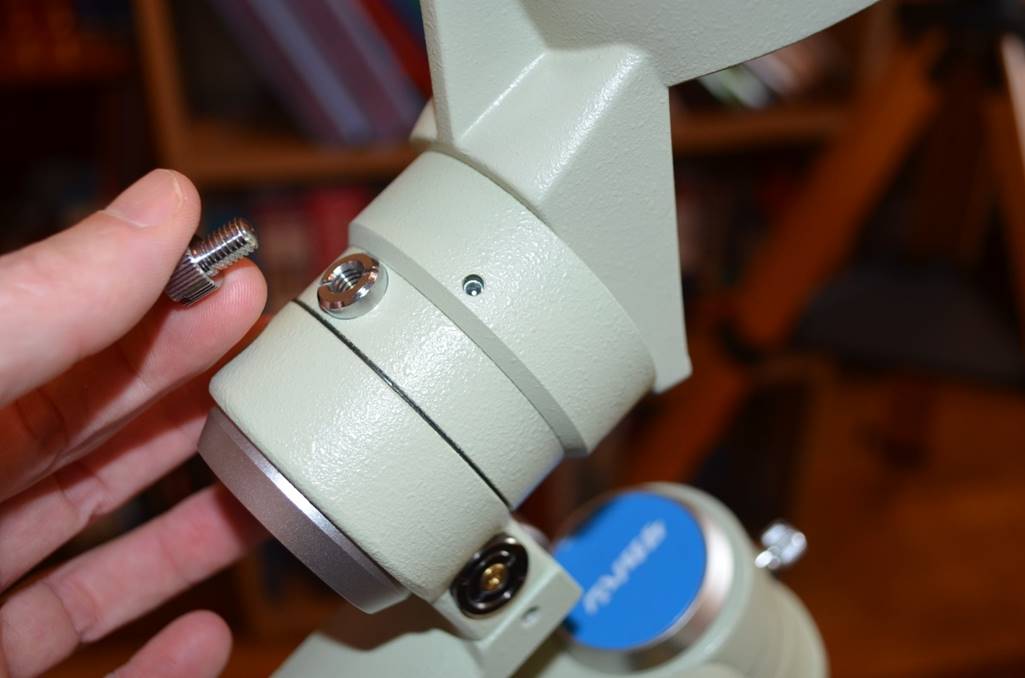
The first thing to understand about the Teegul is that it
isn’t one mount, it’s (at least) three, all of which have quite
different configurations using the Teegul components (and some extra
accessories) put together in different ways. The key to this lies in the fact
that the RA and DEC components are separable, locking together with tiny set
screws. (Don’t understand? Trust me, it’s easier to look at the
photos).
I’ll describe these three possible configurations
separately below.
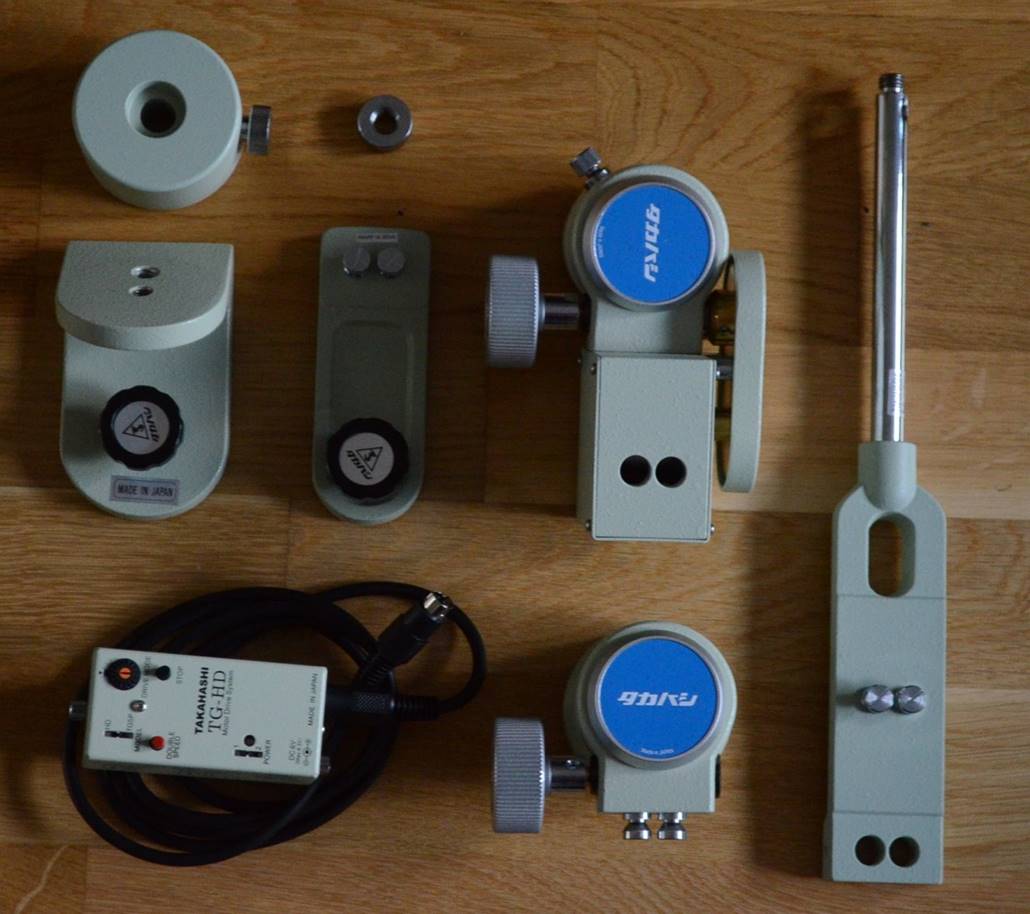
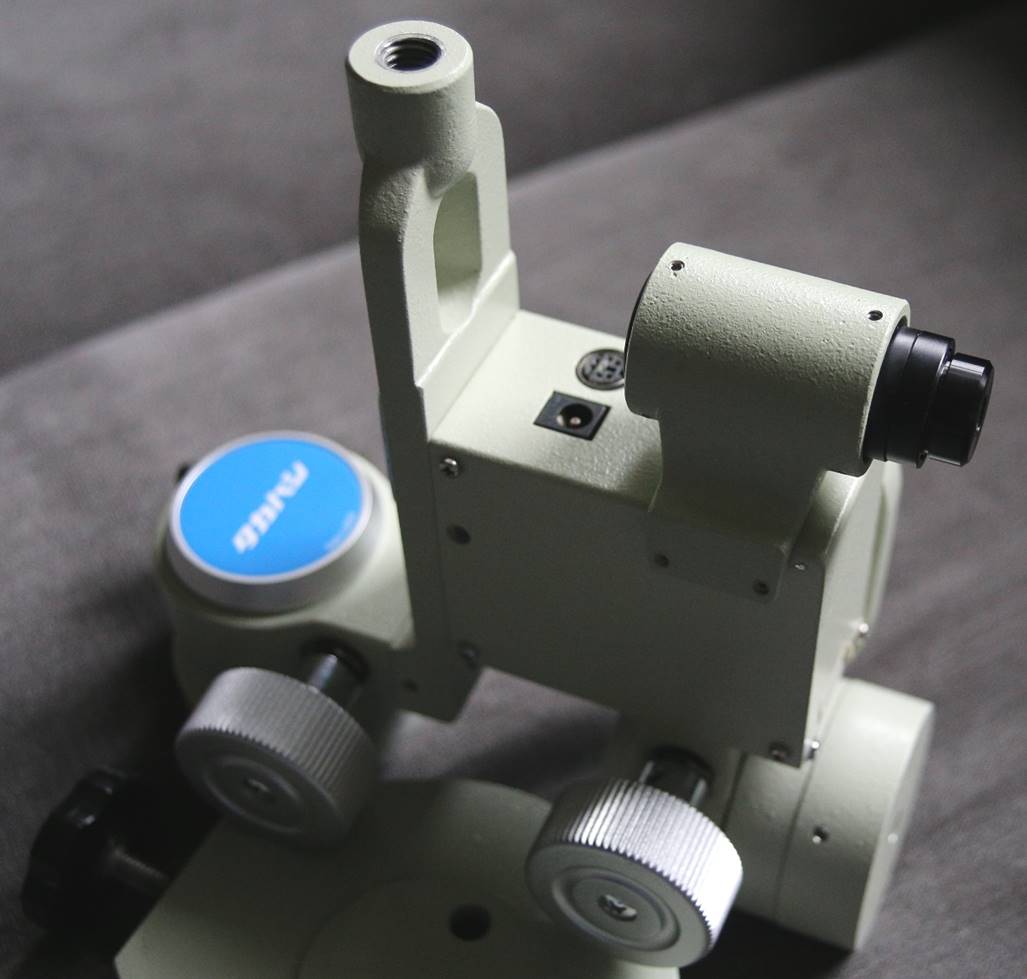
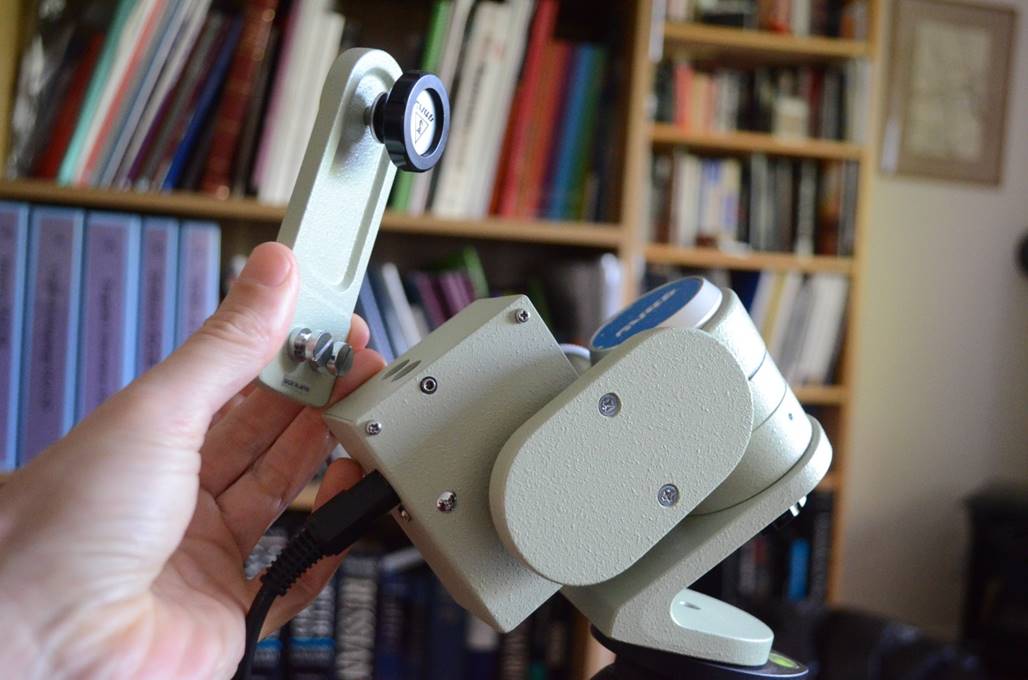
Takahashi Teegul SP3 components
1. Single-Arm Fork Configuration

Most promotional photos of the Teegul show it in this
configuration and this is how the SP3 is supplied in its most basic form, if
you don’t buy the counterweight set.
It’s a slightly tricky arrangement, but is easy enough
to setup once you realise it’s not
a German Equatorial!! This configuration only works for the shortest OTAs
(i.e. the FS-60) and even then, it won’t give you coverage of the whole
sky because the focuser interferes with the RA housing (see photo below). It
does have the advantage of being very solid and compact, though, and is perhaps
the ideal eclipse-imaging configuration.
I’ll say it again: it’s
not a German Equatorial! You have to disassemble it and put it back together in
a different configuration to make it into one (see below)!
It’s
easier to look at the photos than read an explanation of how it goes together.
When I first got it, this had me scratching my head; the previous owner clearly
never got past that stage!
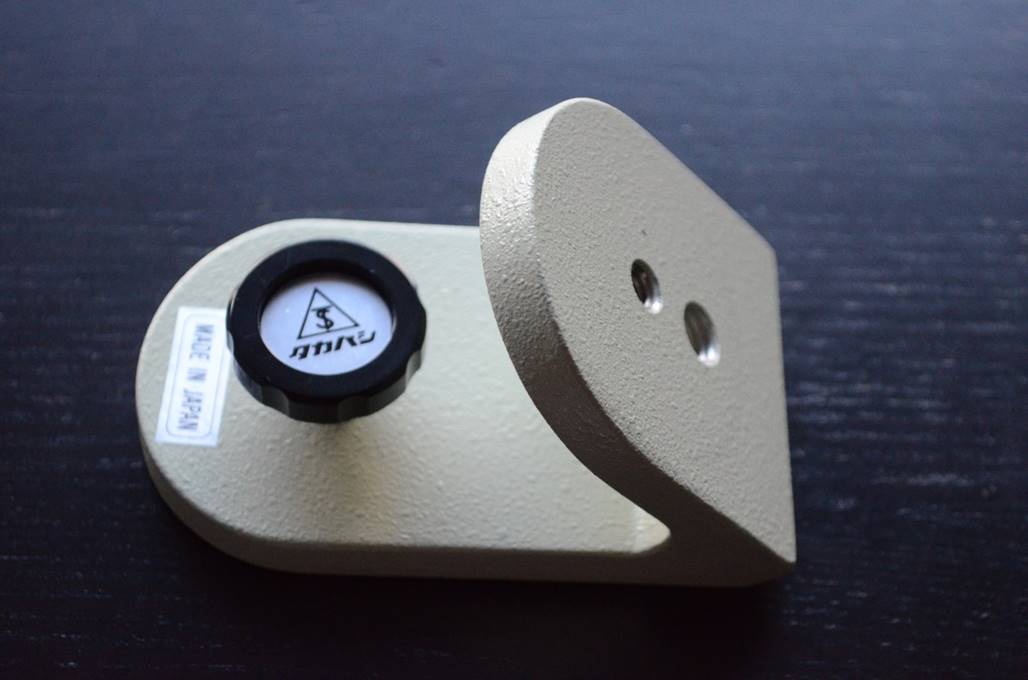
Tripod Adapter
The
mount as sold doesn’t have a native means to align the RA axis with the
pole, it just has a ¼-20 thread on the bottom. So, unless you live at
the pole like Santa you will need one of two Takahashi accessories (or use a
tilting photo head of some sort): either the TSH60100 Tripod adapter head or
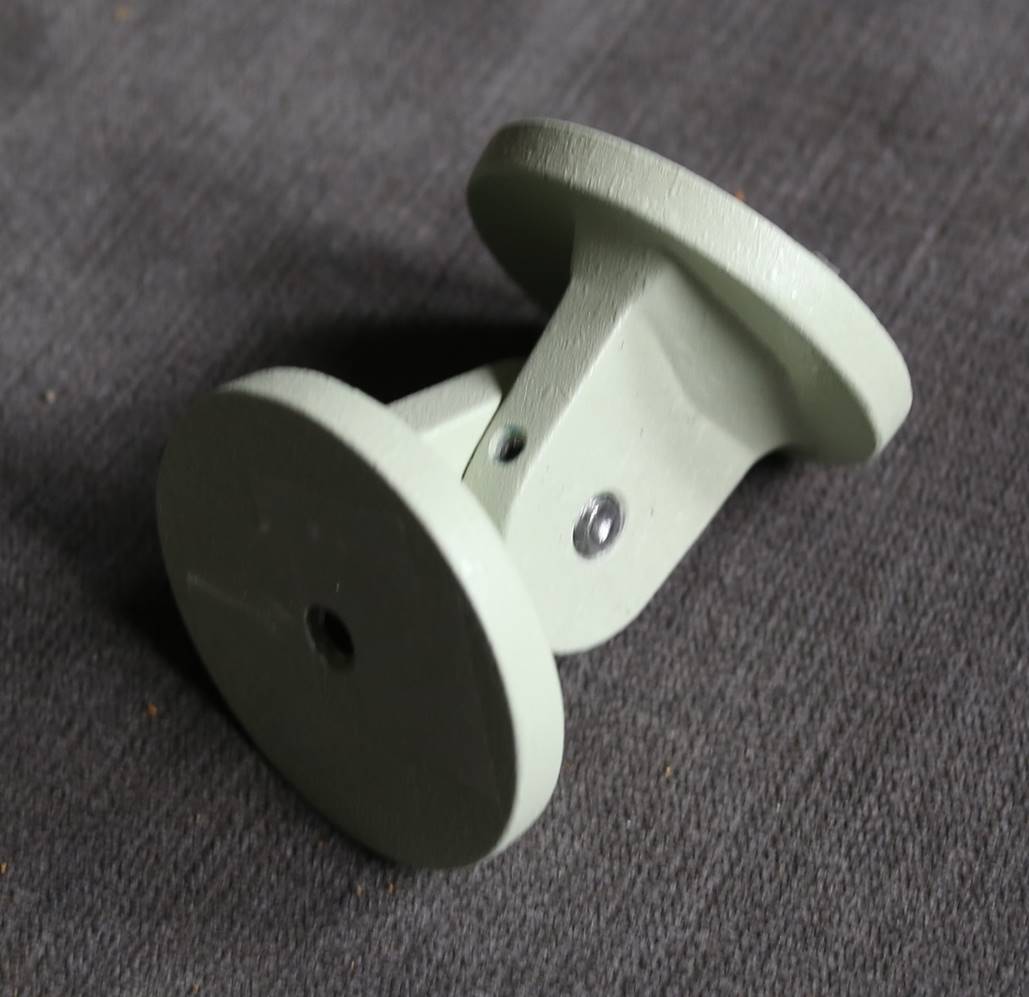
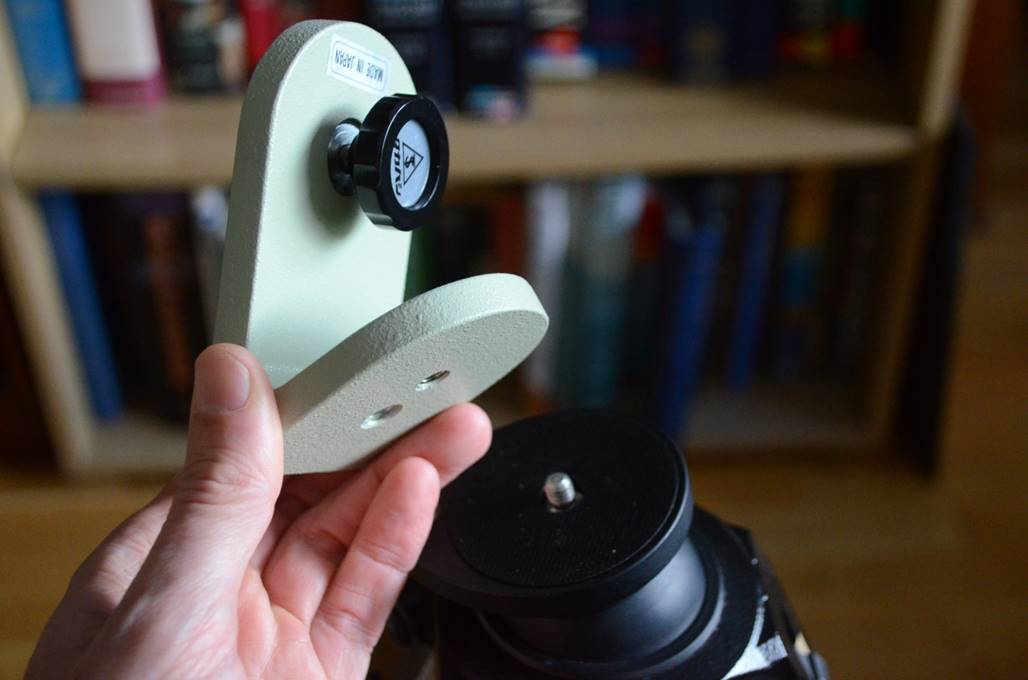
the TSV60100 V Adapter (shown below). The V adapter is a fixed 45° wedge that fixes to the top of a photo tripod and the bottom
of the mount. This is quite a neat accessory that also makes a cheap, light
wedge for a Questar!
The
adapter head is just a pivoting elbow held by a single screw that bolts to a
photo tripod. It will adjust for any latitude; I haven’t tried it.
Pretty
obviously, the V plate alone isn’t going to work unless you live in
southern Europe or the central US, but there is a way around this that
I’ve used here: buy a tripod with a locking ball head; the combination
will give you precise latitude adjustment, but with the solidity of the V plate.
TSV60100
V Adapter.
TSH60100
Tripod adapter head.
The V
Adapter fits to the ball head in the tripod to allow accurate polar alignment.
Takahashi
make a table-top tripod for the Teegul, but I’ve used a small Berlebach
(Report 1032) ash tripod that is light, folds-up small, looks good and damps
vibration very effectively.
Tube Ring
The mount head is designed to accept the FC-60/FC-50/FOA-60
68mm and FS-60/FS-76DC 80mm tube rings. It has two M8 threaded holes with the
standard 35mm Takahashi spacing. Third party dovetail clamps do exist, but the
best solution may be to use one of the two Mewlon
plates Takahashi makes that also fit Vixen plates fine - TKP71422 for the Mewlon 210 and TKP70422 for the Mewlon
180 version:
TKP71422 dovetail plate for the Mewlon 210.
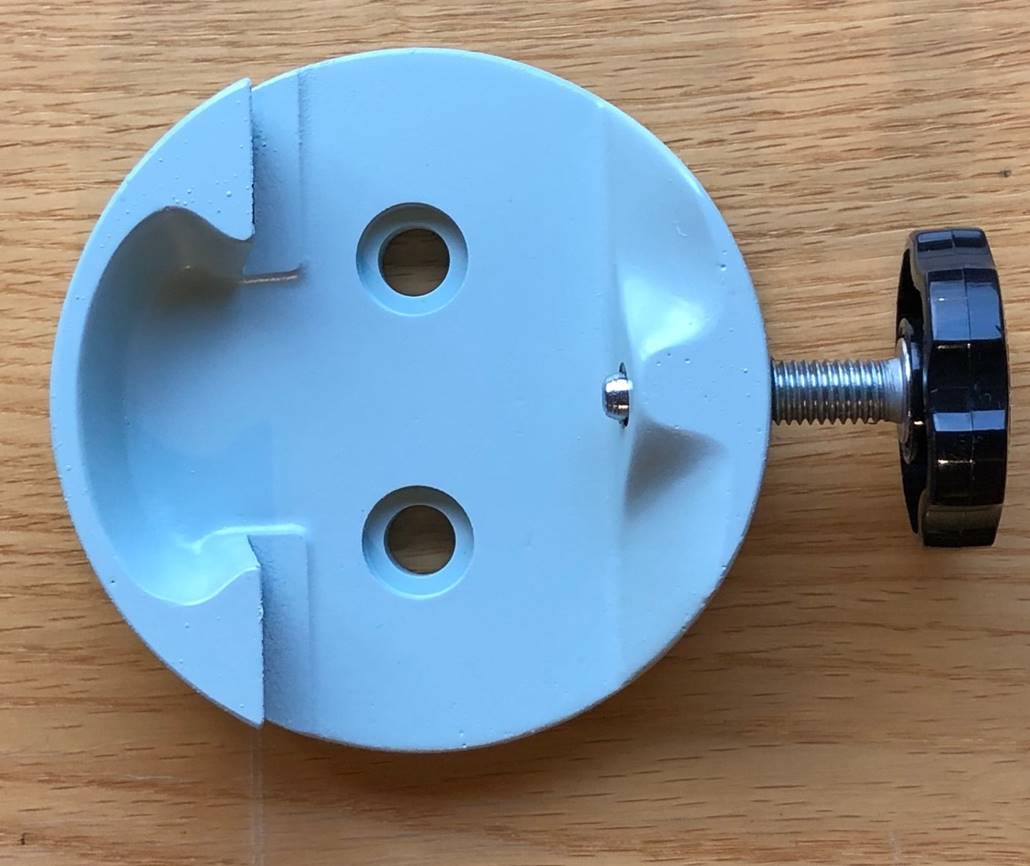
TKP70422 Mewlon 180
dovetail plate (note: it’s the post-2016 light blue colour).
Control Box
The motor has a typical Takahashi drive box that works with
all three configurations described. In the SP3 variant, the control box holds
the batteries (4 x AAA) and connects to the enclosed RA motor with a single DIN
cable (older versions have a separate battery box). It’s also possible to
connect an external 6v power supply.
The control box is typical Takahashi: complex, fiddly and
retro, but beautifully made.
A
photo of the box is shown below. The ‘Drive Mode’ dial gives you
the choice of solar, sidereal, 0.3x, 0.5x and 0.7x rates, in either hemisphere
(eclipse-chasers take note!) and double speed or stop for fine tuning your
pointing. A rather bright red LED flashes when it’s running, but note
that a rapid pulsing of the HD
control unit light indicates low battery and the mount will not drive properly.
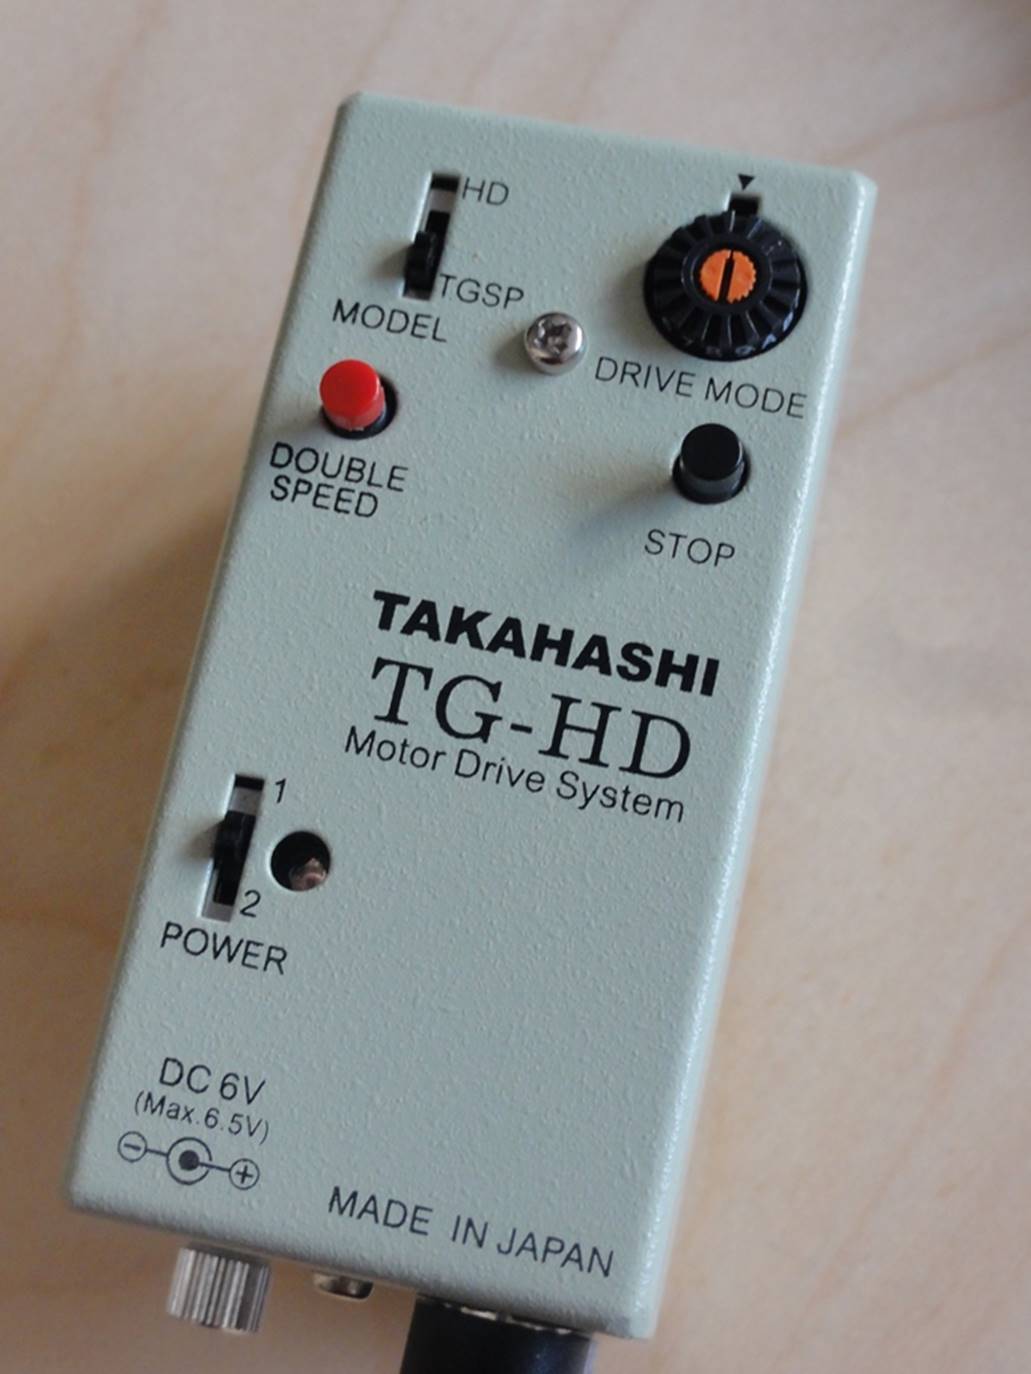
The TG-HD control box for SP3.
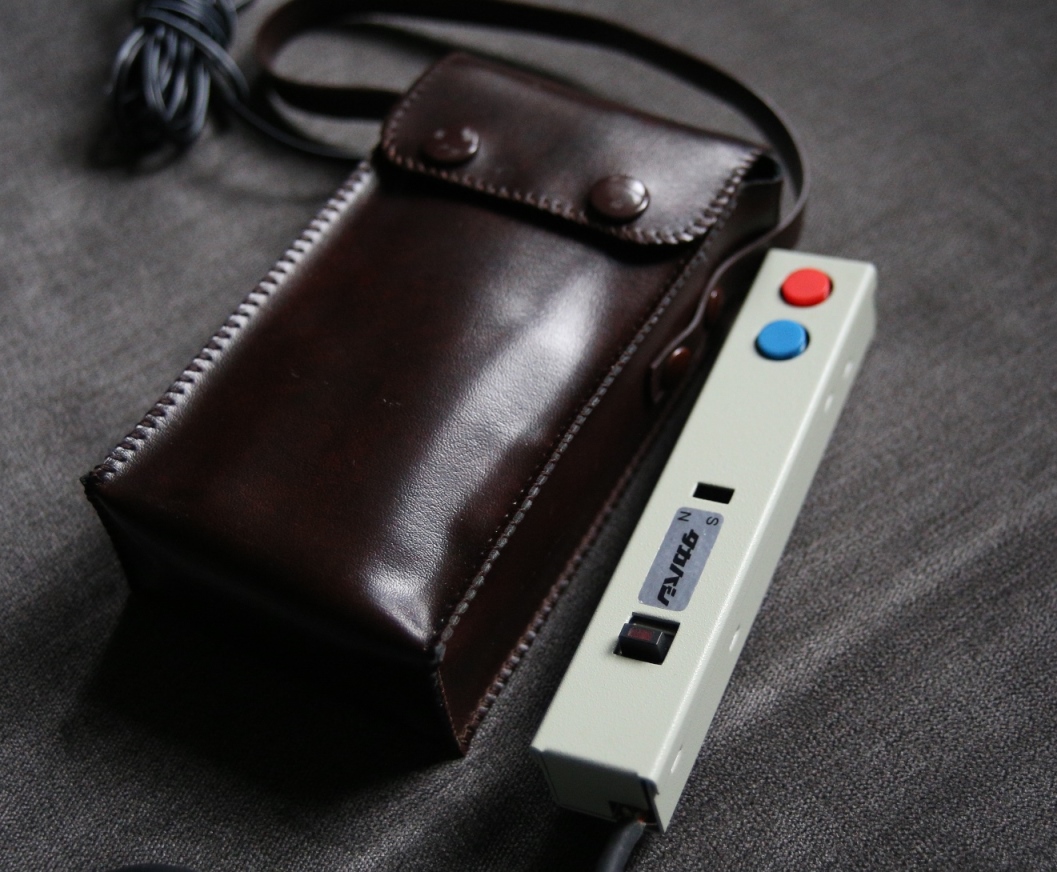
The older SP2 version houses its batteries in an external box
and has much simpler controls.
In Use – Single
Arm Fork
The fork is very stable and stiff and damps vibration almost
instantly with the FS-60.
The slow motion controls on each axis are smooth and have
in-built clutches (no need to tighten a clutch when engaging RA drive).
However, this does mean the mount will drift a bit in RA until the slack is
taken up after you move it with the slo-mo control.
The knurled screws that tighten the axis clamps are small and fiddly –
they have to be that way for clearance.
Drive is quiet, smooth and effective, given that drift
caveat. The single-cable control box is convenient; it’s pretty fiddly,
though (the double-speed and stop buttons are miniscule). Eyeball alignment
with Polaris gives very effective tracking for visual use; you’d need the
German configuration and accessory polar scope for imaging.
The big downside with this (fork) configuration is that
viewing near to and pole-wards of the zenith is tricky due to the clearance
problem. For solar system objects like the Sun, this isn’t going to be a
problem.
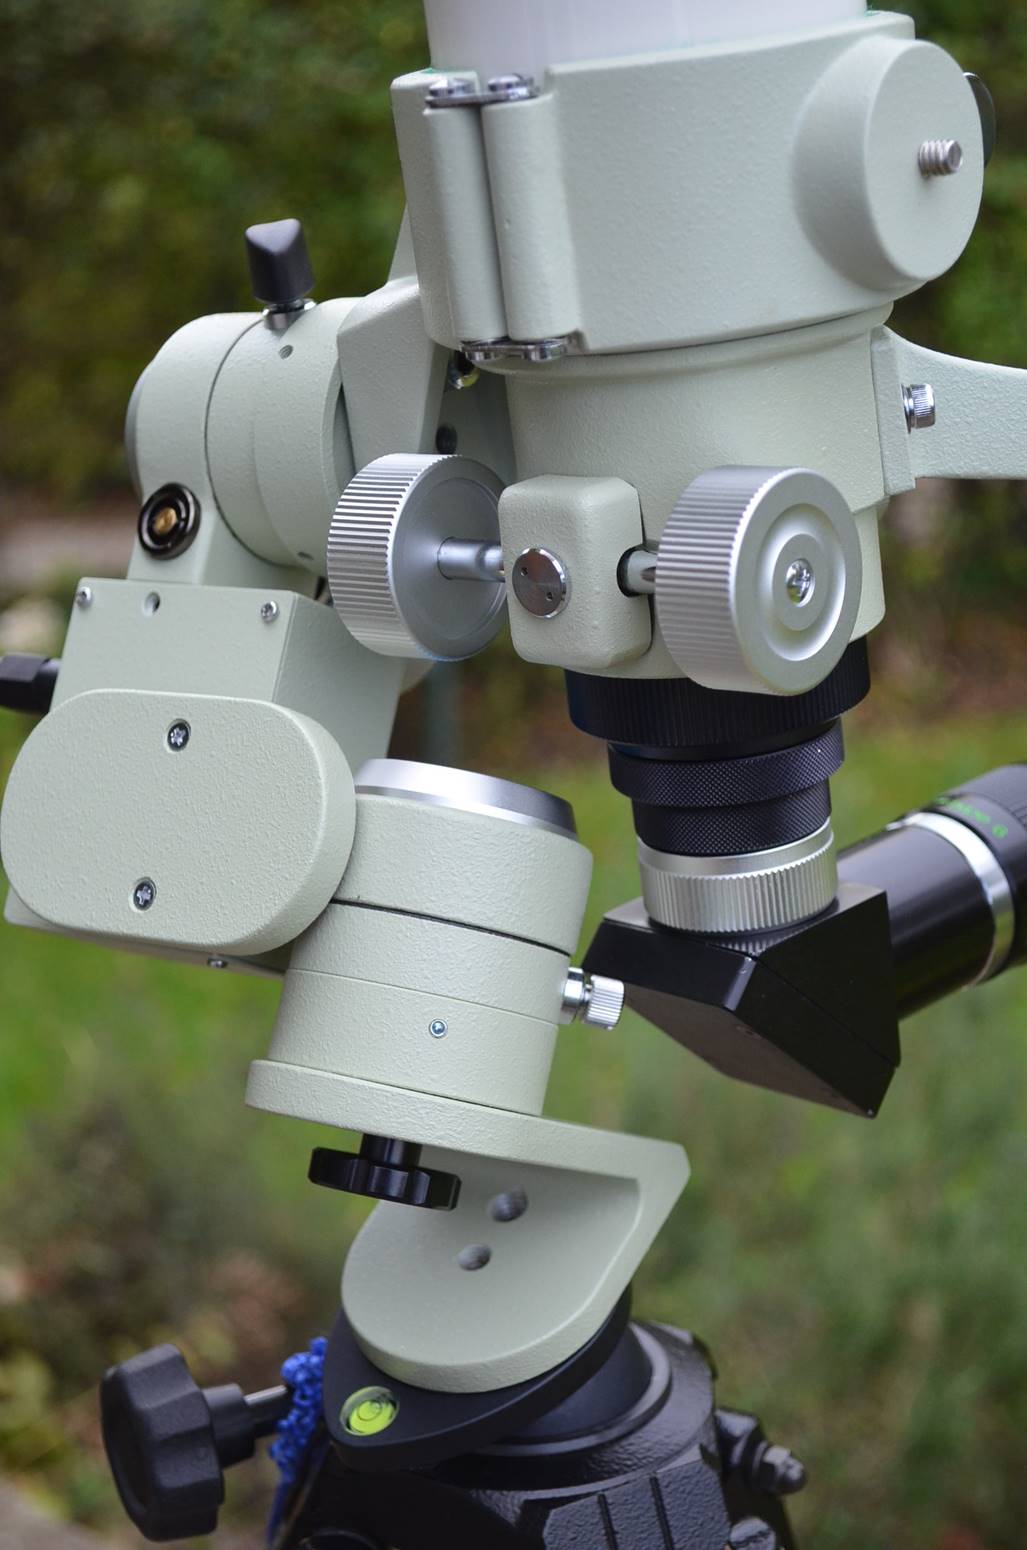
In single-arm fork configuration the Teegul lacks clearance
near the zenith.
2. German Equatorial Configuration
Takahashi Teegul SP3 in German Equatorial configuration.
In this configuration, the Teegul is a fabulous little German
equatorial with a driven RA axis that is very light but will take scopes up to
a 3” refractor. The clever design means the built-in RA motor acts as a
partial counterweight, so you only need a 0.6Kg weight for any scope the mount
will carry. You rarely see pics of the Teegul put together like this, perhaps
because it requires a separate kit to get it to work. The parts you’ll
need from the Takahashi catalogue are:
TSP60110
Teegul SP3 Mount and TG-HD Drive controller
TSE60100
Counterweight kit incl 0.6Kg weight
A
picture speaks a thousand words and I talk enough already, so I’ve taken
a photo sequence to show how to convert the mount from fork to German
Equatorial. Note that a smaller DEC clamp screw is included for extra
clearance.

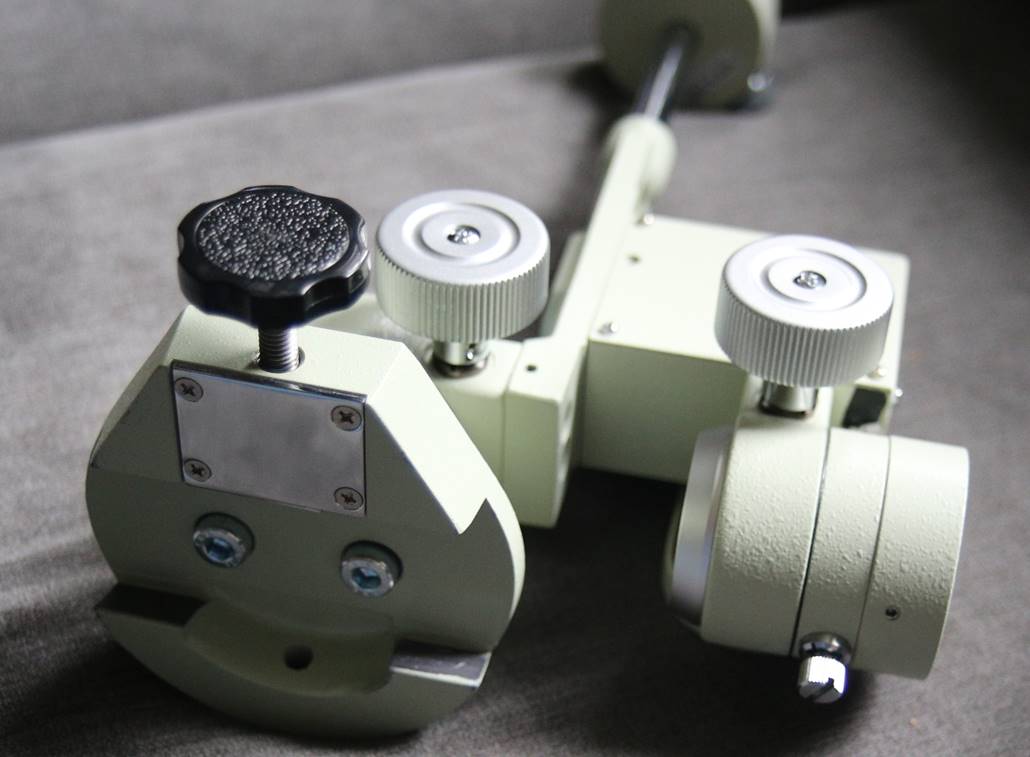
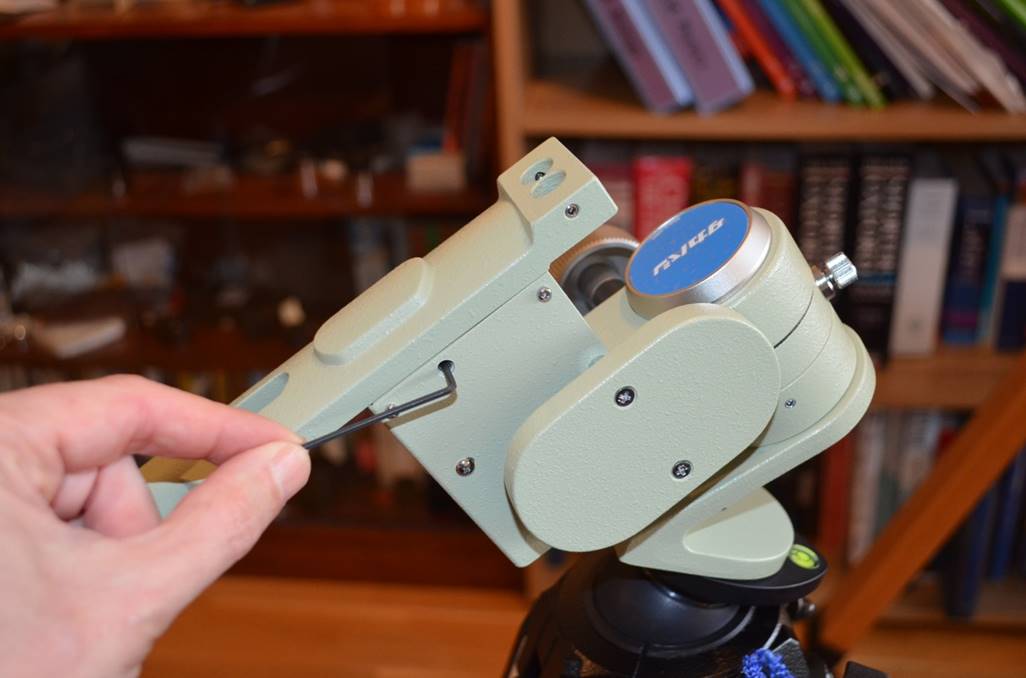
Step
1: Loosen the clamp screws and separate the axes
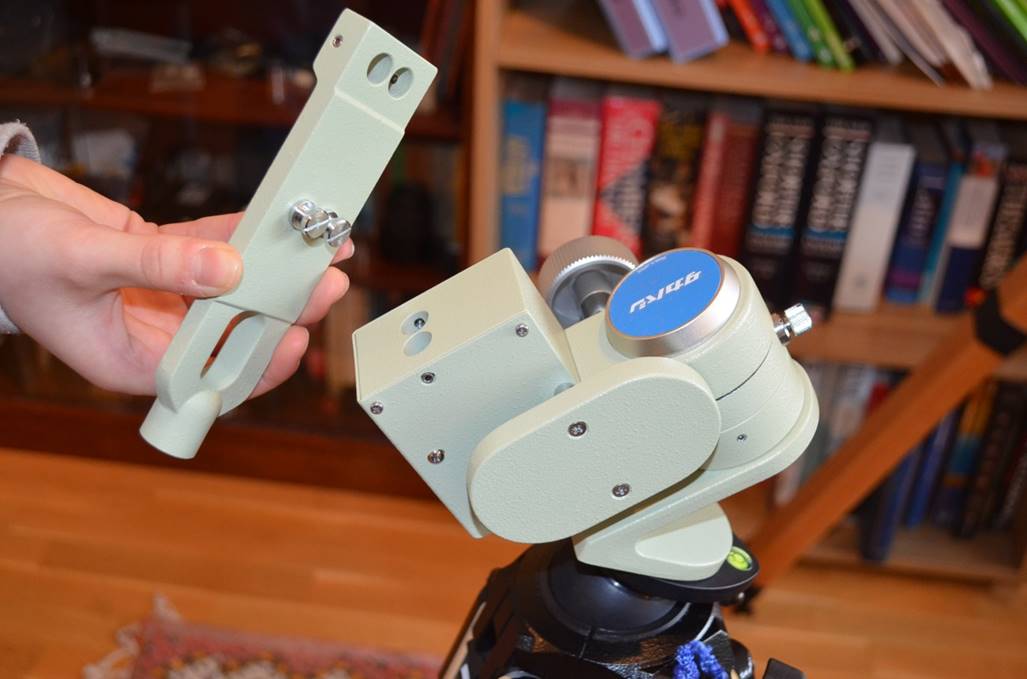
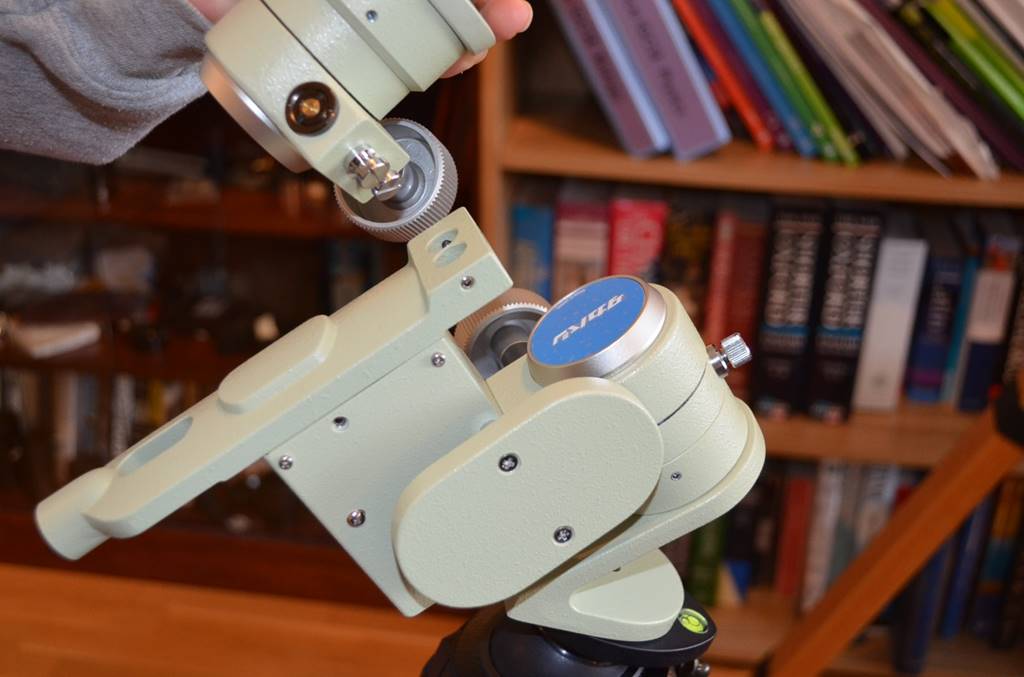
Step
2: Fit the counterweight-shaft plate onto the RA axis module.
Step
3: Tighten the set screws
Step
4: Fit the DEC module to the counter-weight shaft plate
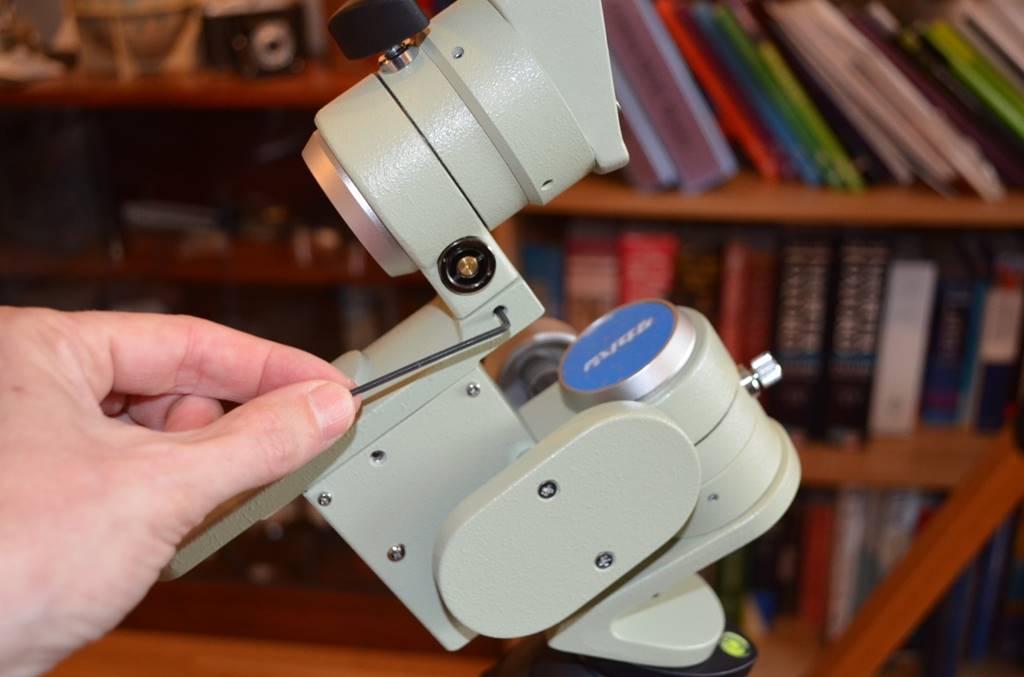
Step
5: Tighten those set-screws
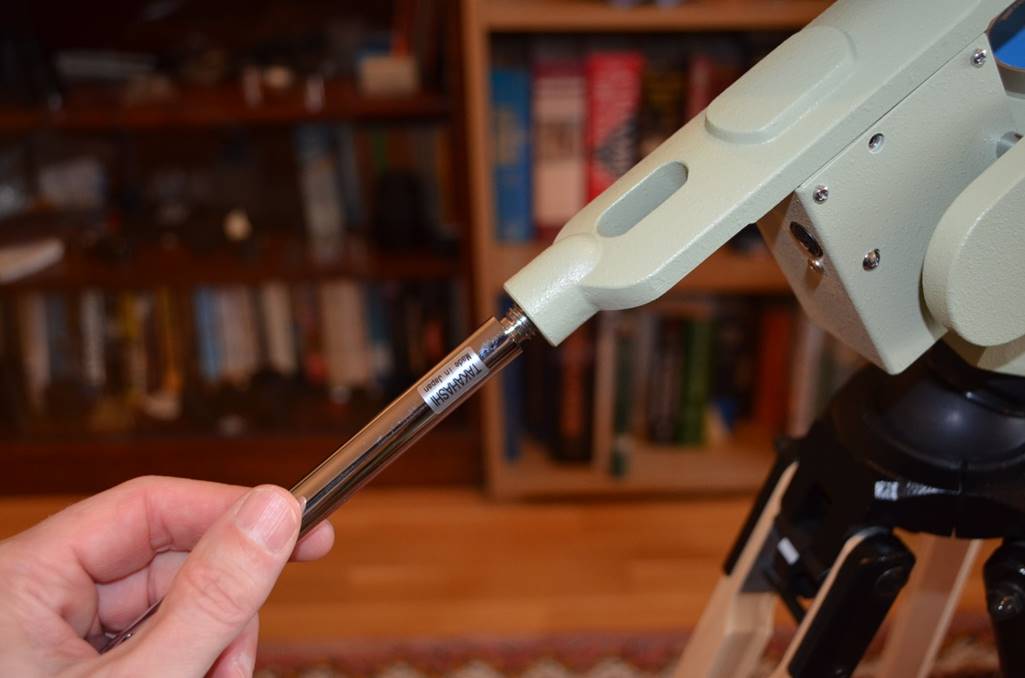
Step
6: Fit the shaft and counter-weight
Step
7: Swap-in the smaller DEC axis clamp knob. Note that ideally this is in the 2
o’clock position from the front for optimal clearance.
Polar Finder
The
accessory buying and fitting doesn’t quite stop there. For imaging
you’d need the optional polar finder that clips to the RA motor housing
and looks through that slot in the DEC axis. I haven’t tested it. The Tak
part number is:
TPF60100
Polar Finder
In Use - German
Equatorial
The Teegul is highly effective in this configuration and is
surprisingly stable and vibe-free for scopes in its capacity range (up to 3Kg).
The FS-60Q shown weighs about 2Kg and is fairly long, but vibes damp very fast
and planetary viewing at high magnification is possible. As you can see in the photo below,
the counterweight isn’t at full travel when balancing the FS-60Q, so the claim of up to 3kg seems
reasonable.
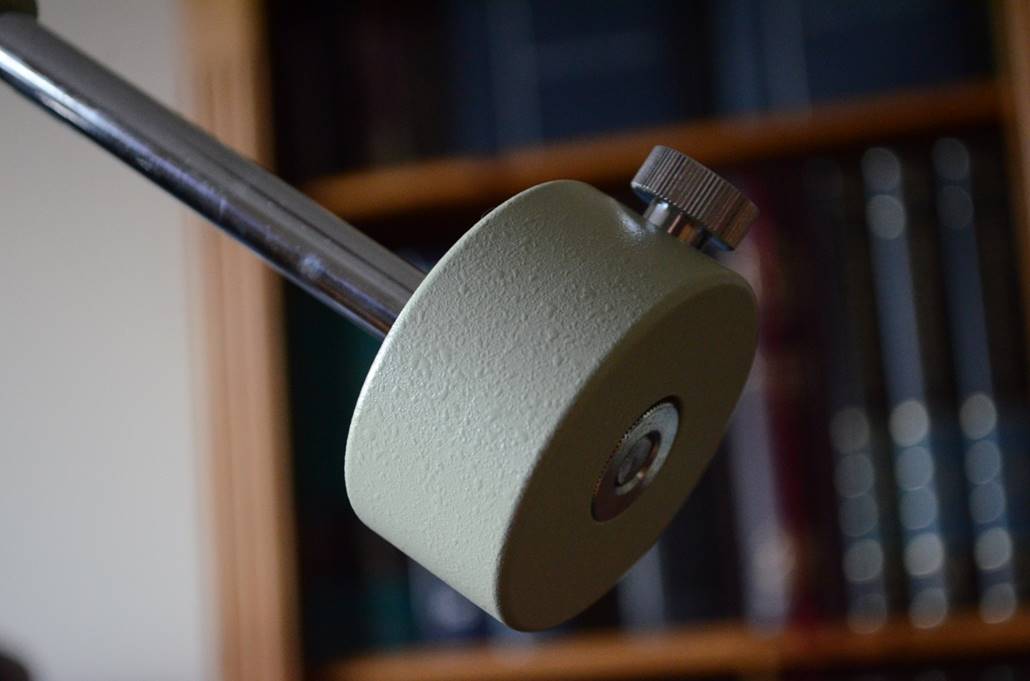
Teegul 0.6Kg counter-weight, recessed for extra travel
Note that the counter weight has a recess on one side so it
can be pushed right over the safety screw on the end of the shaft to provide a
bit more travel for a heavier scope.
The whole FS-60Q setup shown in the end photo is one-hand portable and would break
down to fit into a carry-on case (incl the tripod).
Other Takahashis fit too! Below is the recent FC-76DCU which
is surprisingly stable on the Teegul. Also shown is the classic FC-60. You
always see the FC-60/Teegul like this with the OTA pushed fully forward in the
clamshell. That’s because it’s the proper balance point and
otherwise the focuser wheels hit the RA housing. Note also that with the
counterweight in that position it’s perfectly balanced (partially by the
motor) as shown.
Teegul SP3 with FC-76DCU.
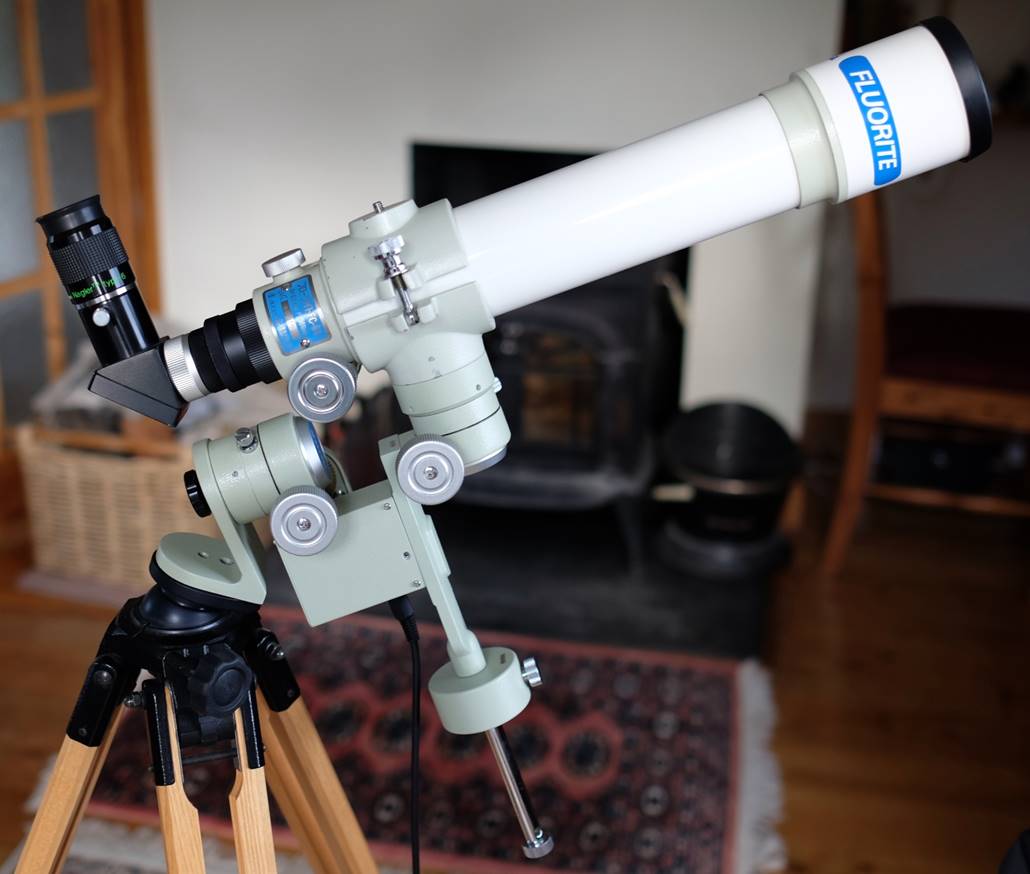
Teegul SP3 with FC-60.
3.
Camera Configuration
The
Teegul camera plate attaches directly to the RA module.
The
Teegul works in a third configuration: as an RA-only camera mount. It’s ingenious,
but once again means taking the mount apart and re-assembling it. Another
accessory is needed as well (you knew it):
TSC60100
Camera Plate
To
mount the plate you have to first remove the DEC axis; the plate mounts
straight onto the RA module.
This
configuration is designed for short focal-length (wide-angle) camera lenses
only, i.e. for capturing large swathes of sky. There is no DEC adjustment
possible, you can just swivel the camera on its mounting-thread to point at
different parts of the celestial equator. This may seem a puzzling limitation,
but think about it: most of the star fields and extended nebulosity you might
want to capture with a wide angle lens are near the celestial equator, right?
You want to image a single DSO at higher image-scale? Use a telescope! That, at
least, seems to be the rationale and it does make sense, especially given the
extreme portability of this configuration (the whole mount weighs perhaps a
kilo this way) – perfect for easy transport to the kind of dark site
where you’ll be taking those kind of wide-angle exposures of the galactic
plane.
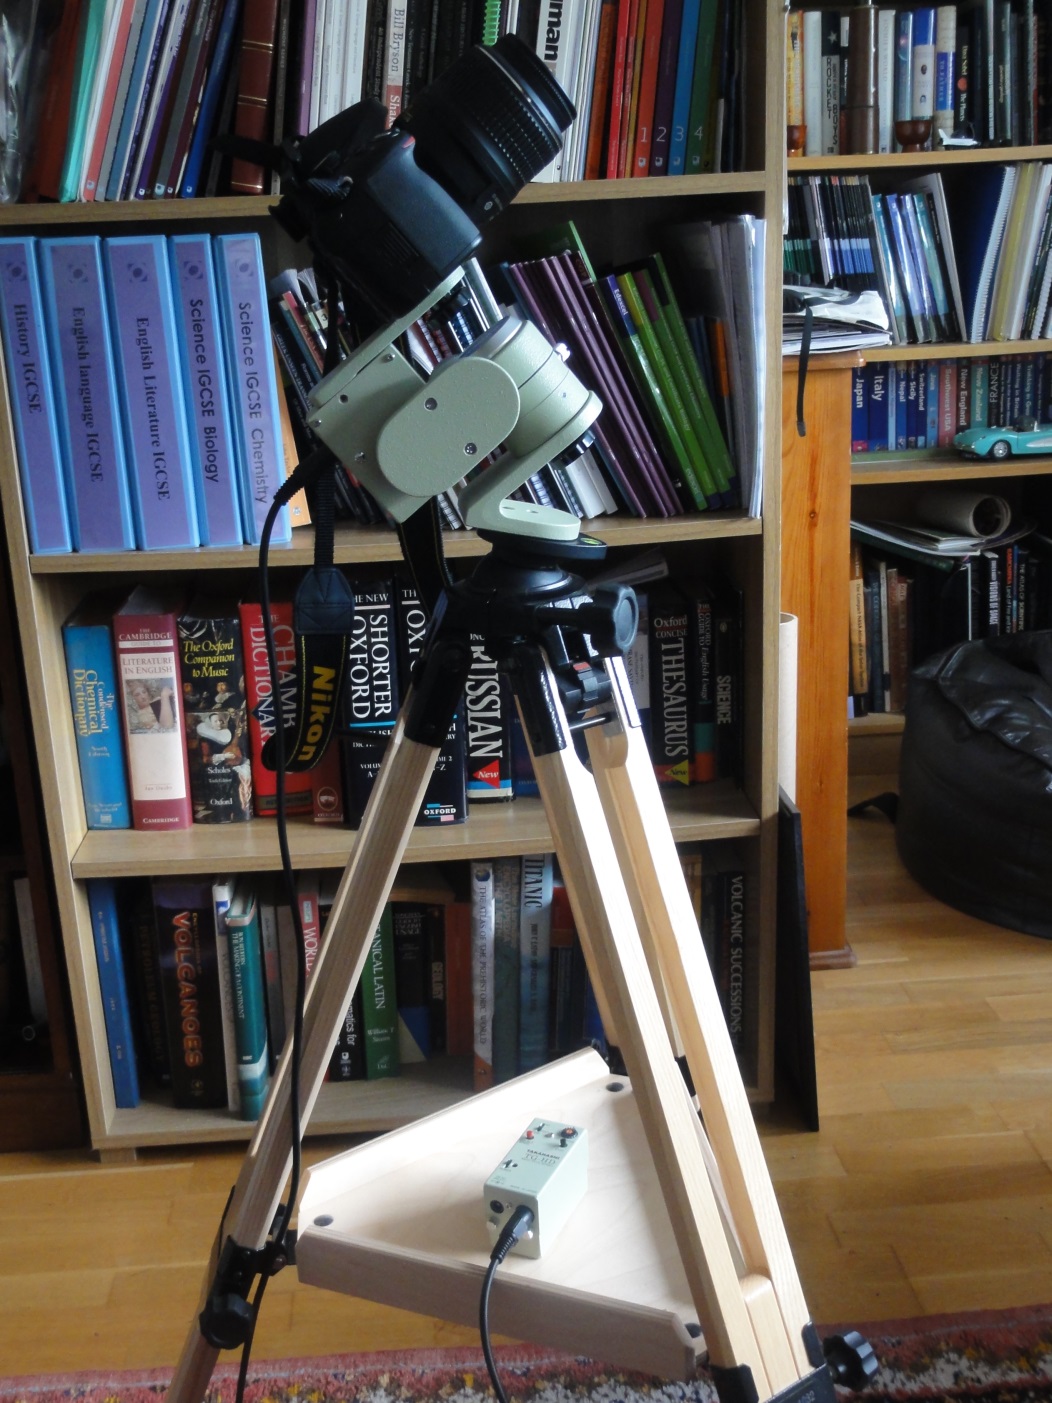
Teegul
SP3 configured as a camera mount.
Summary
The Teegul’s highly-flexible, modular construction is far
from easy to figure out at first, especially given the unhelpful Japanese
instruction booklet. However, when you understand what it’s capable of
(and have spent big on all the accessories), it’s a uniquely capable
micro tracking mount for small refractors.
The Teegul’s small component size and light-weight, counter-weight
minimising design, accurate RA drive and flexible control box, make it ideal
for travel and especially for eclipse-chasers; building it up from its
palm-sized components only takes about five minutes once you get the hang of
it. All the components would fit in a small peli-case
for transport.
Downsides
include cost and the drift you get whilst the drive takes-up play in the
clutch. Nonetheless, I absolutely love the Teegul and find it a real
improvement over an alt-azimuth mount for the kind of high-magnification
observing I do. Like the Questar, you can configure a portable personal
observatory around it that you can carry in one hand, but that tracks and so
allows you to relax at the eyepiece.
The Takahashi Teegul SP3 is highly recommended for those
wanting an ultra-portable equatorial grab-no-go and for serious astro-travelers (especially eclipse-chasers). The Teegul is also
attractive to fetishists of Tak’s lime-coloured castings (including me).
Takahashi Teegul SP3 / FS-60Q is an interesting alternative
to Questar for eclipse chasing
Update
2019: Tak discontinued the Teegul and replaced it with the PM-SP, but that only
lasted a few years and has also now been discontinued. The PM-SP is better in
some ways (better drive, integral polar scope, more clearance), worse in others
(heavier and needs a much larger counterbalance precisely because of that extra
clearance).

PM-SP mount with FOA-60.