SkyShed POD Review
When I first became seriously
interested in astronomy, in my early teens, my Mum bought me a subscription to
Sky and Telescope magazine.
Sky and Telescope is widely
available over here now, but it wasn’t back then in the late Seventies. At that
time the Atlantic seemed much wider than it does now: McDonalds was an exotic
novelty that my girlfriend and I would travel to London or Milton Keynes to
sample; Coach tours to the U.S. (I desperately wanted to see Yellowstone and
The Grand Canyon) cost as much as they do now, 35 years of inflation later.
So my Sky and Telescope had to be
delivered direct from the ‘States, complete with distinctive brown wrapper and
USPS Airmail stamp. Every month I looked forward to it plopping heavily through
the letterbox...
I loved Sky and Telescope
magazine, loved the adverts for gear you couldn’t buy here (Unitron
and Questar and Criterion), loved the Star Parties
and the big home-built dob’s
and weird folding refractors. But the thing I most hankered after was an
observatory, which every Stateside astronomer seemed
to have, usually on some desert ranch surrounded by snow-peaks.
So I developed a longing for my
own observatory from an early age and always imagined it nestled in a pine
forest under dark skies, a short trail-walk from my ranch house in the Utah mountains. Dream on.
Of course, I never got my
observatory and pretty well gave up on the dream because I never lived anywhere
with the space and sky views. I did once make a little angle measuring tool to
survey the horizon from various points in the garden of the terrace where I
grew up, but the inescapable conclusion was that there was nowhere suitable for
an observatory.
In fact the whole observatory
thing really only popped up again a few years ago after a few nasty incidents
where I slipped carrying heavy chunks of mount or scope around my sloping lawn
in the dark. What’s more, I was getting tired of re-aligning for every session.
Even then I delayed because I
couldn’t find anything that suited my needs and budget. A wooden roll-off shed
just seemed too flimsy and leaky to house expensive gear permanently. I wanted
a proper eight-foot Sirius dome with motor-drive, but it cost many thousands
too many. The seven-foot fibreglass dome made here was just that bit too small,
the twelve-foot much too large. I also considered a fancy aluminium roll-off
but worried it might not stand up to the Autumn gales
that we get up here.
Then a friend suggested the
then-very-new Sky Shed POD. The Promo film showed one being driven at
speed on the back of a pick-up to prove the point that it could stand high
winds. Heck, the script they used was just the same as the “Sky and Telescope” on the front of my Seventies magazines! It
seemed like fate...
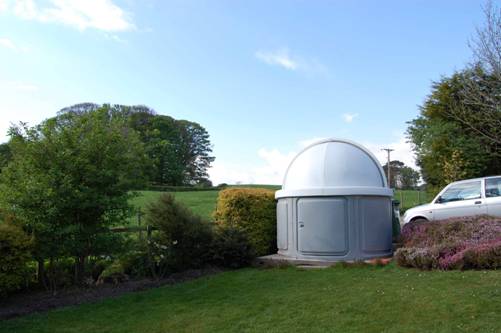
Location,
Planning and Problems
Siting an observatory
is never easy, unless you live on top of a hill. Unfortunately, the only
possibility in my garden was right next to the road, to one side of my drive:
not a perfect spot, but with good views of the ecliptic to the south for
planets and the Moon.
A temporary structure like a POD
is subject to much the same planning rules as a shed, but even so it
technically shouldn’t be permanently anchored down and is subject to various
restrictions about height and distance from boundaries. I would strongly advise
checking with your local planning office before you start building any type of
observatory.
If my house had been
conventionally shaped it probably wouldn’t have been allowed where I put it,
out in front, but as there is no clear front or side to my house I got away
with it.
I say “Got away with it” because
almost immediately I ran into trouble. Naively, perhaps, I imagined that because
I live on a country lane, opposite fields and not directly overlooked by
neighbours, there wouldn’t be any problem. Effectively the only people in a
position to complain about my observatory were local dog walkers, but complain
they did. I’m sympathetic, believe me: I can only imagine the distress caused
by having to look at a white dome whilst waiting for your dog to finish
crapping on my drive.
So inevitably I got a visit from
the local planning officer, but he was very nice about it and gave me the
all-clear without further ado. That, I hoped would be that. Errr... no.
For at least a year, crowds would
gather next to my drive, pointing at the POD, shouting and rubbernecking at me
and my family to see what kind of perverted weirdo puts that thing in their
garden. I became increasingly irritable toward people who asked me (often
rather aggressively) “What the hell is that
thing?”
The planning officer admitted
that the complainer had thought the POD to be a pagan temple and I had more
than one complaint about the colour (“Does it have to be white?”). Another passer-by said he thought it was a
huge composter.
Pagan temple or giant composter? The POD caused considerable
local controversy.
The final act was one night at
Easter when I woke in the small hours to find two drunks climbing on the POD
and trying to prise it open. When I asked (amazingly politely, I thought) what
it was they wanted, they ran off screaming “What the f**k
is it? WHAT THE F**K IS IT?”
Since then (I hope) people seem
to have got used to it and things have quietened down. Maybe the Mongolian Yurt
that someone has erected in their garden nearby has directed local ire away
from me.
I admit that I’m still amazed at how much
fuss the POD caused. Perhaps where you live the natives are more enlightened,
but local reaction is worth considering when siting
any observatory.
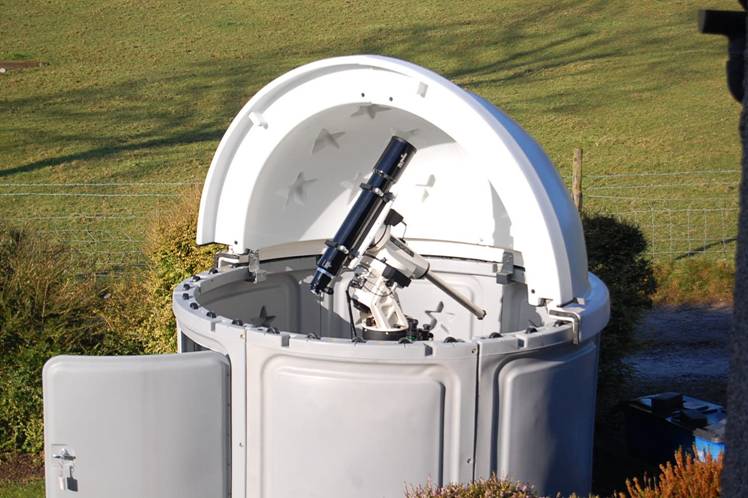
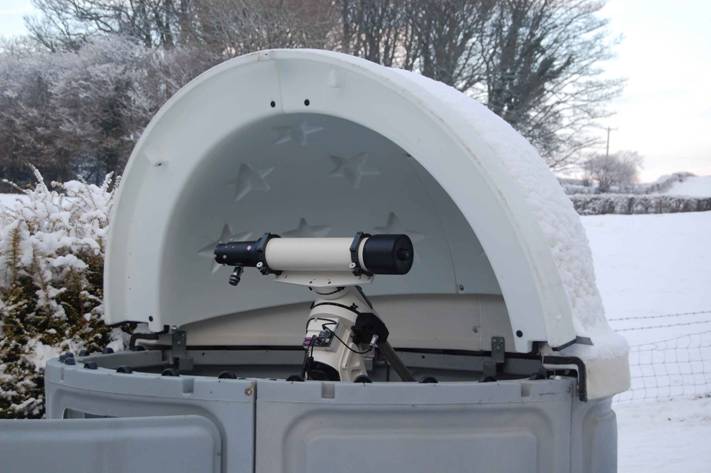
Design and
Build
The POD is a fairly unique
solution to the small home observatory problem. It is sort of a cross between a
roll-off and a conventional dome. The dome rotates on wheels set into the top
of the wall, just like a fibreglass dome, but instead of a slit, half of the
dome flips up like the visor on a helmet. The advantage of this is that you get
more protection from wind and stray light than with a roll-off, but a much
larger sky view than with a slit.
The Dome
The flip-up part of the dome
rotates up or down on two large bolts running through the outer dome. A
waterproof seal is provided by a rubber skirt between the visor and outer part
of the dome. The visor has lugs that locate it with the walls when closed and
two of these come with threads so you can “lock” it by screwing in two
hand-wheeled bolts.
The dome rotates on small plastic
wheels set into the top of the walls that run freely on plastic axles. I
believe modern versions use an upgraded wheel system, though the early version
is perfectly functional, albeit a little heavy and noisy to turn.
To open the dome, you lift the
rim of the “visor” part from inside and push it open or pull it closed. The
inner “visor” part slides in underneath the fixed outer dome when open. Handling
the dome takes a reasonable amount of strength, especially to prevent it
slamming when closing. For this reason I
wouldn’t recommend the POD for children or the infirm.
Walls and Door
When my mate bought his seven-foot
fibreglass dome he had to hire a removal van to collect it, because the walls
and dome each come moulded in one piece. By comparison the POD is intentionally
much more portable because the walls and dome break down into sections (four
for the dome, six for the walls) which you then bolt together on site. Not only
does this make delivery and setup easier at home, but you could in theory take
the POD with you to star parties.
You can choose to replace one or
more of the wall sections with useful alcoves that give more storage space. I
didn’t have space to be able to do this, but I have to say that the damp
problems I have encountered would prevent long term storage of books, clothing,
or even computer equipment (more on the damp later).
The basic build material is
polyethylene in a double wall moulding. This seems like a great choice, because
it is light and tough and you can choose from various colours (I went for white
and light gray). However, there is one obvious disadvantage compared to fibreglass
(as well as a few less obvious one I’ll get back to): it’s thick. This means that the internal dimensions are
significantly less than the outer, both in width and in height (especially
in height, because the “visor” part of the dome runs inside the outer part).
You should take this into account when planning your pier height and when
working out what will and won’t fit in terms of OTAs and mounts.
I measured minimum internal
clearance width and height of the inner dome as follows:
H 224cm W
187 cm (to an accuracy of +- 2 cm)
The inner dome is secured to the
walls by metal brackets carrying wheels that can further reduce clearance on
longer scopes, but because these attach to the outer dome, they fall within the
187cm figure given.
A moulded door is provided in one
of the wall sections. The door fits against a seal, but in my POD the fit is
only partial and blowing rain can leak in. The door is secured by sliding bolts
top and bottom operated by the handle. The mechanism is a bit rudimentary and
stiff.
Overall build quality of the POD
is good, but the mouldings are a bit rough in places and a few plated ferrous
parts (like the dome brackets and hinge bolts) would be better made from
stainless.
Foam Fill?
You can (and I did) order the POD
with the cavities filled with foam. If you go for this option, the walls and
outer dome are filled, but the flip-up part isn’t because it would make it too
heavy to lift. The foam makes the structure heavier, more robust, better
insulated and more opaque, but on the downside the parts are heavier to move
and assemble and the foam does go yellow over time, spoiling the colour of the
plastic parts. Overall I wouldn’t
recommend the foam option.
Will Your
Scope Fit?
It’s very hard to be specific
about what will and won’t fit in the POD. I reckon that like most small home
observatories, it’s designed for the ubiquitous 8-12 inch SCT. Certainly, an 8”
or 10” SCT would fit easily in the POD on an equatorial wedge. Larger SCTs
might be a tighter fit, though SkyShed claim SCTs up
to 14” will fit.

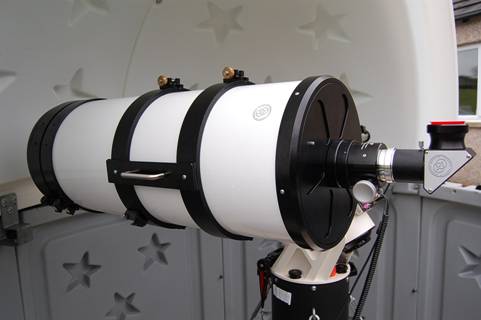
My 12” Dall-Kirkham fits in, but is a tight squeeze and requires
manual slewing near the zenith (see left pic).
Longer refractors on German
equatorials are more of an issue and larger mounts exacerbate the problem. You
obviously need to ensure nothing hits any part of the POD during slewing, but
you also need to allow enough space to look or image through the scope when
it’s in use! Allow for racking out the focuser to accommodate long focal length
eyepieces when planning.
I would strongly urge you to make
detailed scale drawings to check that your scope and mount will fit, but even
that is not a complete solution, because differences in balance points,
accessories and even the way your mount slews will all change things. It’s
almost impossible to allow for all the variables, unless you model everything
in a CAD tool or similar (someone has written a program to do this and at the
time of writing you could download it from Altair Astro’s
website).
To give you an idea of what it’s
possible to fit in the POD, my AP1200 mount fits in fine and a small 5” OTA,
like an NP127 or an ED120, can be slewed around the entire sky without risk. My
7” TMB is really too large, but by weighting the focuser end to allow full
retraction of the dewshield when slewing, it does
fit... just. However, I often have to carefully slew it manually when pointing
near the zenith to avoid hitting the dewshield on the
dome. A shorter pier would help (I use a 42” pier), but would mean some very
uncomfortable eyepiece positions. Clearance at the focuser end can be a problem
too, especially around the brackets that hold the dome on.
The
NP127/AP1200 are an easy fit: you can use GOTO
anywhere, even with the dome shut.
Preparing a
Base
I went for a concrete slab with a
damp-proof membrane. I did the digging, then had the concrete laid professionally. The builder got it very flat and level.
I then bolted the POD onto the slab using big anchors drilled into the concrete
and screwed through the holes provided through the flange at the base of the
POD walls. After much thought I decided against a permanent pier, as a moveable
one allows me to “tune” the position of the pier within the POD (I have settled
with it offset southwards to give me a bit more space behind the scope in its
most common position).
You often see PODs mounted on
decking with the pier protruding through and in retrospect that might have been
a better option. The reason is that waterproofing around the solid base is an
ongoing problem because the POD flexes slightly with use, loosening any sealing
compound you put around the base to prevent water running under it. A decking
base would collect and channel water less than solid concrete.
Assembly
A comprehensive video is provided
and I found the POD fairly straightforward to assemble. For a step-by-step
account of assembly, see the Sky Shed website. Assembly took the best part of a
day and would need at least two people and preferably more.
Most of the required parts and
materials are provided, like rubber sealing strips, but you will need to buy a staple gun to attach the draught excluder seals
around the dome hinges.
You start by assembling the dome
into its two halves. This requires a certain amount of perseverance, as the
mouldings aren’t perfect. You have to put a waterproof strip in each of the
joints. I did this very carefully, but have had to back it up with a bead of
silicone that needs regular replacement because the plastic is greasy and
thermal contraction loosens the sealant over time.
Fixing the rubber-curtain sealing
strip to the outer dome requires considerable care. Do this when you’re fresh
and allow plenty of time to get it right. If you don’t, you’ll get kinks in the
rubber and the seal won’t be good, allowing water to get in between the outer
and inner dome segments.
Having assembled the dome
segments, you then bolt the walls together, which is easy enough to do. The
dome outer is then lifted onto the walls, followed by the inner opening part,
and the two are bolted together. You need to leave the walls loose and unfixed
until you’ve done this, as running the dome around forces the wall segments
into a perfect circle.
Finally, you attach the brackets
that keep the dome on, after which the POD can be bolted down (or not,
depending on how permanent you want the installation to be).
Electrics
The POD doesn’t come with
electrics. I just drilled a hole through the walls, then
ran in an armoured cable from an RCD in my garage. You could go as far as
having a separate fused circuit added to the main junction box, but I haven’t
yet got around to this.
Inside the POD, I wired in a waterpoof twin socket for the mount and accessories and a switch,
designed for garden pond lighting, to operate the red and white lights. I found
that the polyethylene construction of the POD walls makes drilling and
subsequent fixing of electrical fittings quite easy.

Pond-lighting
switch installed. Note the dome-locking handle to the upper right.
For lighting I used a cheap
bulkhead lamp for a white light and a set of red-LED Christmas lights secured
around the base to provide red lighting. I wired both of these into separate
switches.
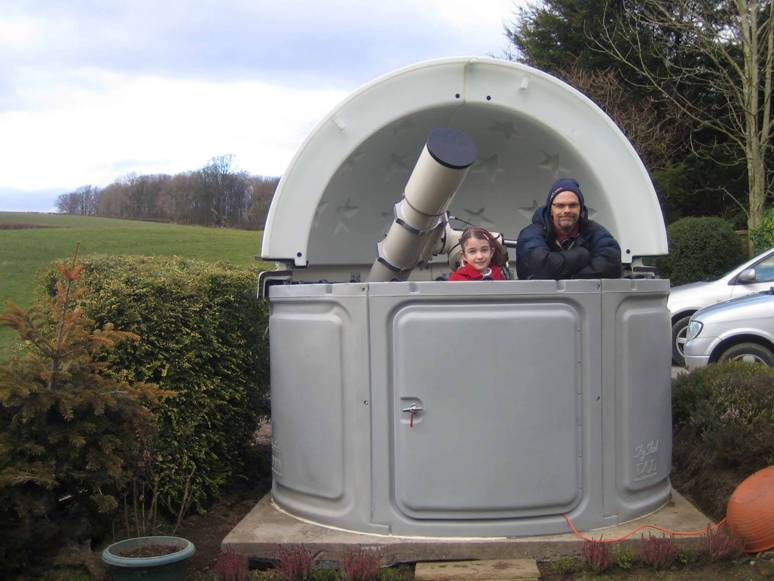
In Use
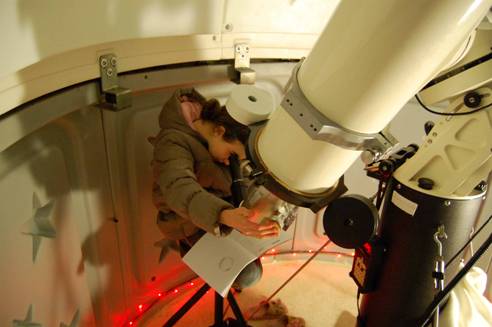
Sketching Jupiter using the 7”: It’s a tight squeeze, even for a
12 year old.
The POD is easy to use, which is
good because that is what an observatory is all about. Getting out and
observing is amazingly easy with a permanently set up and aligned mount and
scope:
A typical observing session sees
me grab the POD keys and a few eyepieces, stuff them in the pockets of my duvet
jacket and walk out of the front door. I then have to walk across 10m of lawn,
unlock the door and twist the handle, reach around and switch the white light
on, duck and walk in. I flip the switch on the mount and (if I have a smaller
scope installed) just select the object I want to view from the GOTO menu
before opening up. As the scope is slewing, I undo the two handles that lock
the dome and then push it open to reveal the night sky, turning it if required.
By then the scope is usually settled on my first target, so all I have to do is
put in an eyepiece (I keep a diagonal in the scope), pull the stool around and
start observing.
The only complication to this
routine arises if the dome is snowed or iced up. I recommend removing snow
during the day and before it gets icy, because ice on the inner dome can rip
and damage the rubber sealing strip when you flip the dome open. De-icing the
dome with buckets of hot water at -15 in the small hours is no fun, believe me.
I found that the door lock ices
up in very cold weather. WD40 helped, but the real fix was a squirt of
something called ACF 50, which is a creeping lubricant designed for the
military and much used by motorcyclists.
Closing the dome is similarly
easy, except that I have to carefully rotate and lower it back into the lugs on
the walls. Letting the dome slam shut isn’t a good idea, as that tends to
loosen seals around the base and dome segments.
The POD makes observing much more comfortable: the dome helps
shield you from the frost and the walls keep wind and stray light out.
Observing in a proper snug little “room” with a floor, light and power is
hugely pleasurable if you are used to a frosty or muddy lawn. Even using a
small scope or binoculars is nicer in the POD, as it gives you privacy and a
break from lights and cold winds. Having almost half the sky in view means you
don’t have to turn the dome unless you start observing in a completely
different part of the sky.
The ease and quickness of opening
and closing the POD dome mean you can observe during short breaks in the
weather without risk of getting your scope rained on – a key benefit in our
climate.
One small issue is that the dome
design doesn’t allow viewing at the zenith.
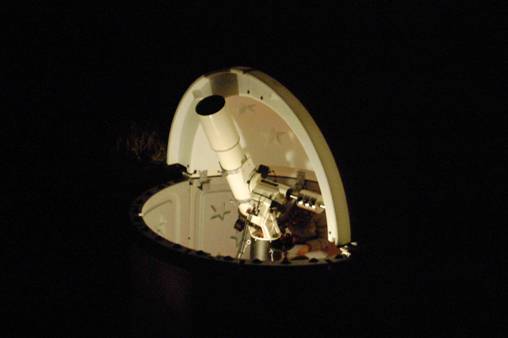
Viewing near
the zenith isn’t possible with larger scopes. Here you can see why.
Overall, the POD is such a cosy and relaxing
environment that I have fallen asleep at the eyepiece on several occasions
during early morning planetary vigils!
Leaks
The biggest problem with the POD,
in my two years of experience with it, is that of leaks. The wall segments don’t
seem to let water in, so the problem areas are the dome joints, the base and
(worst of all) the areas around the dome hinge-bolts.
The polyethylene is greasy and
silicone sealant loosens away from it over time, so I have to renew the sealing
along the dome segments every six to twelve months, but if I do this the dome
remains watertight.
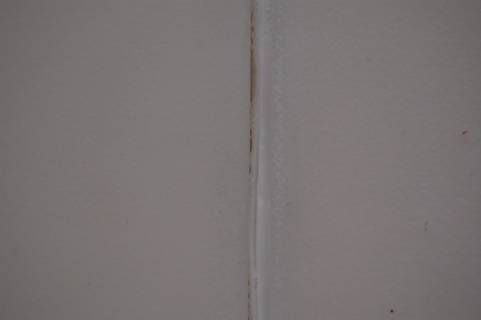
Silicone
sealant loosens over time.
Flexing of the walls means any
sealing around the base always starts leaking with time, but again renewing
this yearly keeps things under control. I have found a combination of foam gap
sealer and regularly-renewed silicone to be the best sealant.
The main problem area, though, is
the seals around the hinges. This area isn’t covered by the rubber strip and
you need to fix extra bits of rubber around them to help keep rain out
(instructions and extra seal material are provided for this). These often get
caught and folded in when I close the dome so I usually have to take a minute
to re-seat them with a thin stick every time I close up.
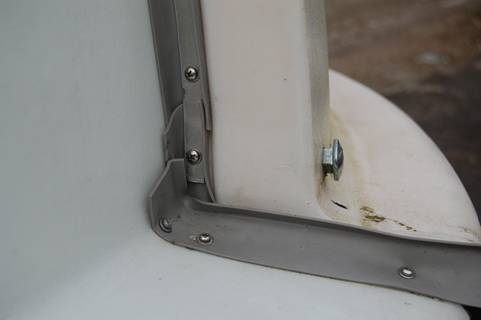
This area is
the main source of leaks: note the patched seal which gets trapped, kinked and
torn easily here.
However carefully I re-seat the
rubber seals, a few cupfuls of water get through every time it rains and I keep
drip trays permanently in place to cope with this. Even so, after wet weather I
usually have to go in and mop up a litre or so of water from the floor, then
turn on a de-humidifier for an hour or two. The latter is a great addition to
any observatory where cold metal parts get wet in high humidity; I have a
Mitsubishi unit that works very well.
Keeping on top of water and
dampness is an ongoing chore, but a much less time consuming one than dragging
equipment in and out. Fail to do it, though, and you
could end up with problems and even corrosion of your mount and scope. I have
seen a horribly rusty Takahashi EM500 (a £10000 mount) in an observatory with
poor waterproofing – don’t let that happen to you!
Summary
In many ways the Sky Shed is an
excellent and unique product that has allowed me to fulfil my observatory
dream.
The Sky Shed is relatively easy
to transport and assemble, unlike many fibreglass domes, and it can fairly
simply be taken down and re-built for home moves and even star parties. The
flip-opening works much better than a slit for many amateurs and broadens the
scope of the Sky Shed to include a huge range of observers (there’s an argument
for one of these even if all you do is keep a deckchair in it to use with binos). The
flip-opening not only allows you to see a much broader swathe of sky and
requires much less dome-turning, it also allows you to house a bigger scope and
mount than a conventional dome of the same size. The POD has proved very
ruggedly constructed and has stood up to some savage storms.
There are a few minor negatives,
like the noisy wheels (fixed on recent models); the sticky door catch (fixed
with WD40, or better ACF50); the fact that the thickness of the mouldings makes
the interior smaller than the external dimensions; the yellow discolouration of
the (optional) foam filling over time. But these are very minor gripes.
However, two years on I have to tell you that
my POD has two fairly significant issues:
·
The
main one highlights the reason I started this website: whilst the POD is doubtless
adequately waterproof for continental U.S. conditions, in the rainy northern UK it just plain leaks too much, despite
endless efforts to seal it. The problem is inherent in its modular design.
Careful assembly and regular re-sealing of the seams with silicone goo will
help, but on very wet days you’ll probably need to do some drying up and
mopping out.
·
The
zenith is a bit of a no-go zone for POD users, because the lip of the fold-up
part of the dome overhangs and obscures it. Big OTAs and mounts exacerbate this
problem.
All in all, though, the best
thing about the POD that the niggles can’t spoil is
that it’s an observatory: a permanent
setup for your gear. I just can’t
overstate how wonderful it is to be able to pop-out at midnight for a quick look
or a few images, then close-up and walk away within minutes. You’ll do ten
times more observing with a proper, permanently aligned rig in this (or any
other) decent observatory.
An observatory is the best thing
you can buy to make this hobby more enjoyable and productive. On that basis,
even given its drawbacks, the Sky Shed POD gets my highest recommendation. It’s
cheaper and easier to transport than a fibreglass dome and offers a snugger
environment (and more robustness) than a roll-off. The only real disadvantages
are leaks and the heavy dome which makes it unsuitable for the weak or infirm.