Snapping the
Moon with a Super Zoom Camera

Olympus
SZ-15 with 24x optical zoom
When I got
into astronomy in my early teens one of the first things I wanted to do was
photograph the Moon. Unfortunately it wasn’t so easy in the pre-digital era and
I ended up equipping my own darkroom so I could push the slow ISO black and
white films of the time.
These days
you don’t need a darkroom, but you do still need a telescope and ideally an
interchangeable lens camera and a T-adapter. Or do you?
If you can’t
(or initially don’t want to) spend the £Several Hundred plus you’d need for a
scope, camera and adapter, there is another way. You (or someone you know) may
have a compact camera with a super zoom lens – loads of families have them
kicking around unused between holidays. If the zoom is ten times or more, you
can get interesting snaps of the Moon that show more than the naked eye. If
your zoom is over twenty times, you can get Moon snaps that are quite
surprisingly detailed. Here’s how.
The Olympus
SZ-15
The Olympus
I’m using for this article is an SZ-15 SuperZoom
point and shoot camera, but I don’t want
to give the impression I’m specifically recommending this particular model; I’m
not. In fact, one of the much larger and more expensive super zoom bridge
cameras would doubtless be better (though less likely to be just lying idle
around your home since the last family holiday).
There are a
series of similar Olympus models, from the SZ-10 on, that include a long zoom
lens; the obsolete models can be had pretty cheaply. Other manufacturers make
super zoom compacts as well and some of them may be
better than this Olympus. I chose this Olympus because it is cheap, available
and common. I’ll quickly review its main characteristics, but I don’t want to
go into full details here – there are numerous reports and reviews online.
Design and
Build
In many ways
the Olympus SZ-15 a typical pocket-size point-and-shoot consumer camera: small,
light and simple. It’s larger than a lot of pocket cameras; but it’s still relatively
tiny.
Build
quality appears reasonable, but nothing special. It has just enough brushed
aluminium to prevent it from seeming really plasticky.
Aimed at casual users, it provides a simple set of program modes and it doesn’t
even have fully manual override; it just happens to have an unusually long
zoom.
Lens
So what
about that lens, then? The specs say that it goes from 4.5mm to 108mm focal
length. But combined with a very small sensor that gives a claimed ‘equivalent’
image scale to a 25mm – 600mm! When they say equivalent, though, it’s not clear
to what exactly. An APS-C DSLR? A
full-frame DSLR? From my experiments, it would seem they are comparing
it to a 35mm camera (i.e. a full-frame DSLR), because the image
scale at full zoom is smaller than a 600mm lens with my APS-C cameras.
Nevertheless, a maximum zoom
equivalent to a 350-400 mm telephoto lens on an APS-C camera is still impressive.
For use on the Moon we should end up with an image scale similar to that from a
small refractor telescope.
Sensor
The SZ-15 has
a 1 / 2.3” sensor – the smallest size generally available (which is why it’s
able to offer such a powerful zoom).
The sensor
has 16 Mp which is a lot to cram into such a tiny
area. The result of this is relatively poor low-light performance. The SZ-15 offers
ISOs settings from 100 to 1600, but it generates a lot of noise above ISO 400,
despite doing some kind of automatic dark-frame subtraction. That doesn’t concern us here because the Moon
is bright and we won’t need high ISOs. Suffice to say that if you were looking
for a point-and-shoot camera to do landscape astrophotography it wouldn’t be
this one. Interestingly, the Sony with a 10x zoom (see Moon photo at end) does
much better for landscape astrophotography than the Olympus, but it’s not as
good for the Moon.
Image Stabilisation
The SZ-15
includes a stabiliser: it’s noisy, but seems effective. You can disable it if
you are using a tripod.
Setup for
Imaging the Moon
Having taken
a brief look at the camera, let’s consider how to set it up to try to get some
images of the Moon.
Mounting on a tripod
To start
with, you really need a tripod. That’s not because you will be using long
exposures – the Moon is bright so you won’t be. From the point-of-view of
shakes you might be able to get away with hand-held photos using the stabiliser.
But there is a problem: the SZ-15 has no manual mode, so to force it to focus
and expose correctly you need to centre the Moon precisely in the field of view
and that means using a tripod. Like most cameras, the SZ-15 has a ¼-20 thread
on the base and you can use just about any cheap, light-weight photo tripod.
So, you zoom
into the maximum optical zoom of 24x (there are
digital zoom setting to twice that) and snap away at the Moon. What you’ll get
will be something like this:
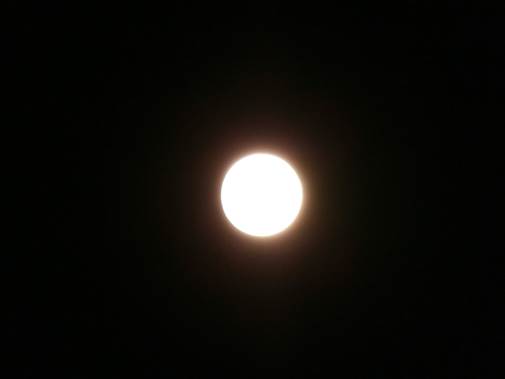
Clearly this
is no good: the camera isn’t exposing the view correctly, it’s trying to get an
average for all that dark sky and ending up massively overexposing the Moon.
You could try exposure compensation, but even setting the maximum value of -2
doesn’t improve things much.
Enabling Spot Focus and Metering
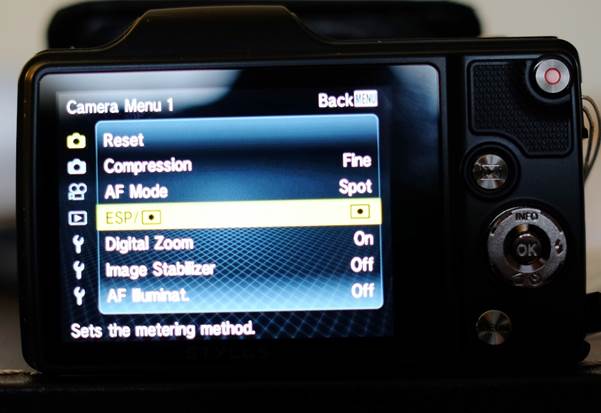
If this
camera had manual settings, we’d focus and expose manually, but it doesn’t. Instead,
you have to force the automatic focus and exposure to adjust for the Moon, not
the surrounding sky:
1. Turn the camera on and hit the menu
button the back.
2. Scroll down to ‘AF Mode’ and select
‘Spot’
3. Now scroll down to ‘ESP’ and select
the icon with a dot in a square instead.
4. Whilst you are at it, find the
‘Compression’ setting in the same scroll-down menu and make sure it’s set to ‘Fine’.
This produces the best quality JPEGs (this camera doesn’t produce raw files).
You have now set the camera up to
adjust focus and exposure only for the spot in the centre of the field.
Setting Exposure Mode and ISO
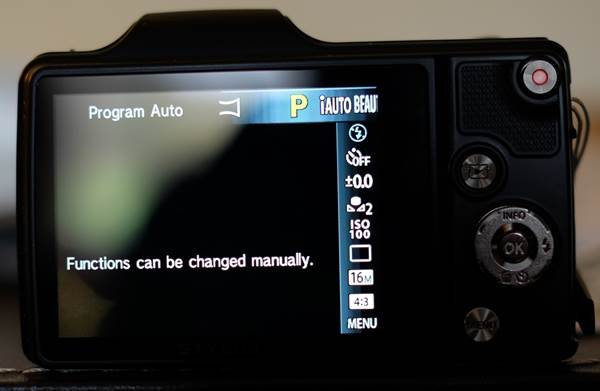
You will
need to select the correct shooting mode and check a couple of other settings.
Turn the
camera on and hit the ‘OK’ button in the centre of the control wheel on the
back.
1. Scroll left and right to select ‘Progam Auto’ and hit OK.
2. Now scroll down and select ‘ISO 100’.
This sets the camera to minimum light sensitivity (like we said, the Moon is
bright), but maximum picture quality.
3. Scroll down again and select ‘16M’
for maximum picture size.
4. Scroll down yet again and select
‘4:3’ for the picture format.
The camera is now setup as well as it
can be for our Moon shots.
Choosing
your Moon Phase
Non-astronomers
are often surprised to hear that Full Moon is the night a lot of astronomers
shrug their shoulders and stay-in watching the telly: Moonlight blots out
anything other than planets, whilst the Moon itself looks least interesting
when full. It’s the same reason photographers don’t much like midday on earth –
no shadows and a bright sun flatten the landscape and wash out colour and
detail. The effect is the same for us, so that full-Moon is the least ideal
phase to snap. You will get more interesting photos when shadows are
highlighting the topography. Even so, if it’s full Moon, still get out there
and have a go!
In the long
run it might be fun to try capturing as many different lunar phases as you can.
Crescents are arguably the most beautiful, but the thinnest crescents very
early (and late) in the Moon’s monthly cycle are difficult to find because they
are close to the Sun and can be a real challenge to capture with your camera!
Snapping the
Moon with your Super-Zoom
After all
that setting up, you might think that getting out there and actually snapping
the moon is a formality. Not quite.
The first
thing to do (once you’re setup under the Moon) is to get it precisely centred
in the metering square in the centre of the frame. This is necessary or the
metering won’t expose for the Moon, but for the dark sky around it, as we saw
at the start.
Once you’ve
done that, press the shutter half-way. The camera should now try to focus and
adjust exposure for the Moon. It may take a little while to settle down,
especially in terms of focus, but it will get there in the end! When it has
done it gives a beep and you can snap away.
Make sure
you regularly download and review your efforts. You may find that playing
around with the ISO setting and the exposure compensation can improve your
shots.
If your
images are blurry it might be camera shake. Try incrementally increasing ISO
from 100 to 200 and up to 400 to force the camera to use higher shutter speeds,
until any camera shake has gone. Precisely which setting
works best will depend on the brightness of the Moon (i.e. its phase) and the
stability of your tripod.
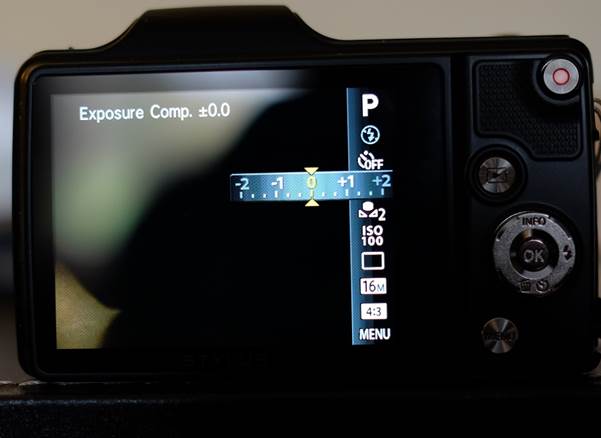
If your
photos look washed out, try setting the exposure compensation to under-expose
slightly. Do this by scrolling down through the menus in shooting mode to the
fourth item down: ‘Exposure Comp.’. Try setting this to values between 0 and -1
(beyond -1 is too much, whilst +ve values will
over-expose).
Post
Processing
Once you’ve
got some photos you are happy with, you can improve them further using
processing software. There are numerous free packages to do this and you only
need the basics.
The one
thing to understand about processing is go slowly, apply subtle changes
incrementally.
Sharpness
Sharpening
your photo slightly (but not too much) will likely improve it. Adjust up the
sharpness in tiny steps just until it looks well defined. Too much sharpening
looks very artificial.
Contrast
Again, a bit
of extra contrast will improve most Lunar photos, but too much ends up with a
very artificial look. However, really pushing sharpness and contrast produces a
rather ‘painted’ impression which can be pleasing.
Colour temperature
You may find
that colour of your Moon shots is wrong. Typically they may be a bit yellow
because the camera has chosen the wrong white-balance. Again you can fix this
in post-processing, either directly with white balance (if the package allows
it), or with colour temperature. Experiment until you get the proverbial fifty
shades (well maybe with a bit of buff thrown in)!
Results
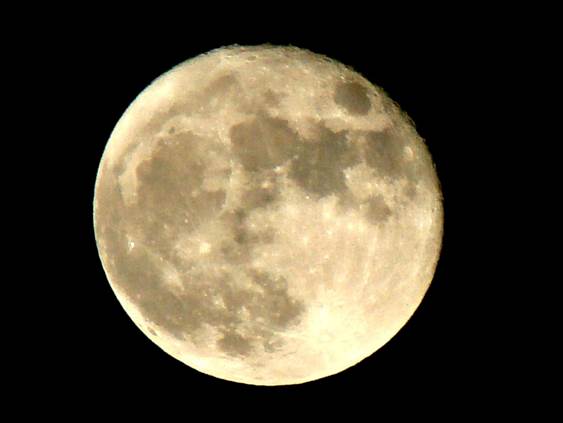
Moon taken with
Olympus SZ-15 at full digital zoom
This was the
best image I was able to get, after several sessions. It’s not great – it’s
still a bit blurred, perhaps from lack of perfect focus, or because optical
quality is mediocre. It also has a mild colour cast. It’s just a cheap camera
after all! Still, it’s an interesting photo with the sort of detail you get through
binos and you can make out many of the main features,
including a few prominent craters like Langrenus at
top right and bright Proclus with its rays at the edge of Mare Criseum; you could easily get an atlas and identify more.
For
comparison, below are (cropped) Moon photos taken with three other zoom cameras
and lenses. As you can see, the best was taken with a Fuji XM-1 and its
50-230mm kit lens. The Fuji is also a compact camera, but one which takes
interchangeable lenses and allows full manual control; it’s a fair bit more
expensive and specialist than the Olympus. Compared with the cheap DSLR zoom
lens and the Sony with a smaller (10x) zoom, the Olympus does well.
From these photos, it seems optical
quality and sensor performance are probably more important than shear zoominess, so if you have a zoom camera lying around –
especially a bridge camera - you may well be able to do better. Have a go!
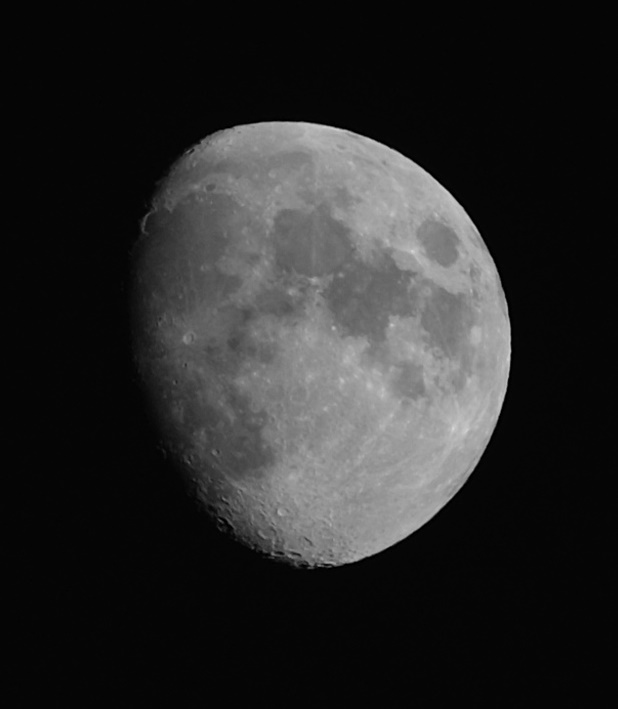
Moon taken
with Fuji XM-1 Camera with 5-230mm kit lens
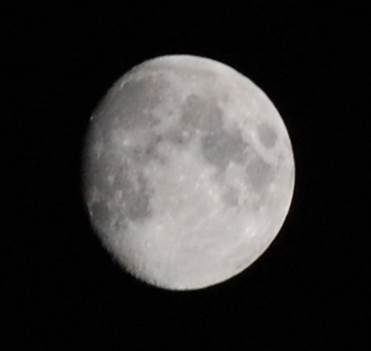
Moon taken with Nikon D5100 with 50-200mm lens.
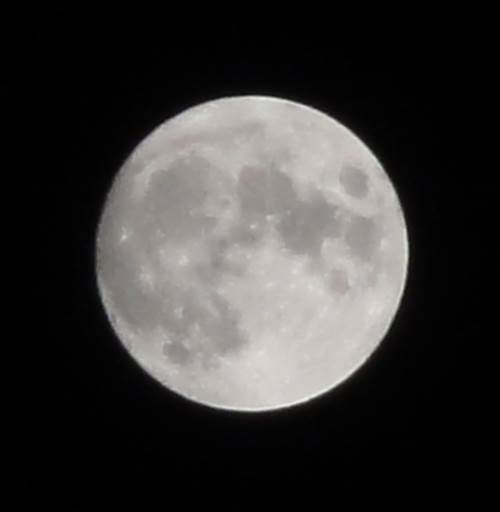
Moon taken
with Sony NX camera with 10x zoom