A Beginner’s Guide to Astronomical Telescopes
Astronomical
telescopes come in all shapes and sizes.
Contents
A Beginner’s Guide to
Astronomical Telescopes
What makes a Telescope ‘Powerful’?
Types of Telescope - Refractors
Types of Telescope - Reflectors
Types of Telescope - Catadioptrics
Types of Telescope - Spotting Scopes
Scopes for Children and Teenagers
Things to Consider when Choosing
Introduction
When my own interest in astronomy developed in
the late 1970s there wasn’t the choice of equipment available that there is
now. Experienced astronomers usually used big Newtonian reflectors, often ones
they had built themselves. Beginners had to make do with small, often
poorly-constructed refractors. Choice was limited and prices were high (at
least here in Europe).
These days your choice is staggering. Telescopes
come in a bewildering array of types and sizes. Prices range from impossibly cheap
to very expensive. To make things worse, there seems to be lots of conflicting
advice out there as to which types are best.
Here I’ll take a look at what a telescope is,
followed by a survey of the different types, along with their pros and cons. Finally
I’ll give you some (hopefully impartial) advice on what and how to buy.
Notes (like this one!) contain asides
and non-essential detail. You can safely ignore them if you like.
What Is a Telescope?
A telescope, you may be surprised to learn, is
a very simple thing. Telescopes make things seem closer than they are, this
everyone knows. They make things appear closer by collecting light to give a
brighter image than the human eye could and then magnifying it to make it seem
bigger.
A mirror or lens (the ‘objective’) collects
the light and focuses it; an eyepiece magnifies it like a reading glass. The
result is that you get to see distant things bigger and brighter than you can
see them with your eyes. That’s it. Every telescope works like this, from my
old pair of 8x30 binoculars to the Hubble Space Telescope.
Don’t believe me? Try this. Take a shaving
mirror, reflect the Moon in it and examine the reflection with a magnifying
glass – that’s a telescope. The details, the design, the size and price vary;
the basic principle does not.
Spyglasses like Galileo’s (or indeed Capt.
Jack Sparrow’s) and most binoculars contain both the objective and the eyepiece
to give a fixed magnification (see next section for an explanation of
magnification). Most astronomical telescopes have interchangeable eyepieces to
give different magnifications.
The word telescope is
derived from the ancient Greek verb ‘scopew’ – ‘I
examine closely’. In fact the Greeks may have invented the telescope.
Descriptions of the Pharos lighthouse in Alexandria hint at some sort of
distance viewer. Over the centuries many other veiled descriptions of
telescope-like optical magnifiers appear in works of Natural Philosophy by
authors such as Roger Bacon in the 13th Century.
Surprisingly though,
the first definitive telescope was invented by a spectacle maker in Middleburg
in the early 17th Century. Perhaps he was just playing around with
different power lenses.
Significantly for us, that delay between idea and
instrument may have been due to the difficulty of making good mirrors and
lenses: telescopes are simple, but they
need precise manufacture to work properly.
What makes a Telescope
‘Powerful’?
Before we can answer this question, we need to
know what we mean by ‘powerful’. It turns out that there are four basic factors
which define a telescope’s overall performance:
1)
Brightness – how bright faint stars and nebulae appear using the telescope and the
faintest stars that the telescope allows you to see. This is largely a function
of the clear size of the telescope’s objective lens or mirror (its ‘aperture’).
2)
Resolution - the smallest detail that the telescope can distinguish on the moon or
a planet, or the smallest gap at which two close stars can be distinguished from
each other. Again, the bigger the telescope’s aperture, the higher its
resolution (theoretically at least).
3)
Magnification - how much bigger an object looks than it does with your naked eye.
This factor is variable. In theory any astronomical
telescope can have any magnification given the right eyepiece, but see below!
4)
Contrast – the way the telescope distinguishes between light and dark and all
the shades in between. This is the most subjective performance factor and
depends a lot on optical quality. Contrast matters when trying to see detail on
planets.
There are other performance factors
which might affect the choice of a telescope for a particular purpose, but the
above four are the basic ones and are true for any telescope. In particular, no
telescope, however well designed and built, can escape 1 and 2 – these are
fundamental laws of physics.
In practice, many telescopes fall
well short of their theoretical maximum performance much of the time due to
factors like poor atmospheric conditions (‘seeing’), imperfect optical
alignment (‘collimation’) and imperfect focus.
From factors 1-4 you might conclude that a bigger telescope is a more
powerful telescope and you’d be right. You might also conclude that you should
therefore buy the biggest telescope with the highest advertised magnification,
but in my opinion you’d be dead wrong. Read on.
The Trouble with High Magnification
The more magnification
the better, right? Wrong! The problem is
that more magnification means a dimmer image and magnification makes any wobble
in the ‘scope, mount or the atmosphere bigger too.
In theory, most telescopes are useful at
magnifications up to about 50-60 times for every inch of clear aperture. Even so, anything much over 100x will need a
steady mount, preferably one that keeps the object in view. In practice, I
rarely use magnifications over about 300x, even in big
expensive ‘scopes.
On many nights the maximum magnification is
limited by turbulence in the atmosphere (‘seeing’) and not the optics.
Adverts for
cheap telescopes that claim ‘capable of 675 times magnification!’ are not
lying, but such a magnification in a small ‘scope will be totally useless. In
the same way, BMW would not be lying if they claimed their latest model would
do Mach 2 … when fired from a big enough canon.
Telescope ‘Numbers’
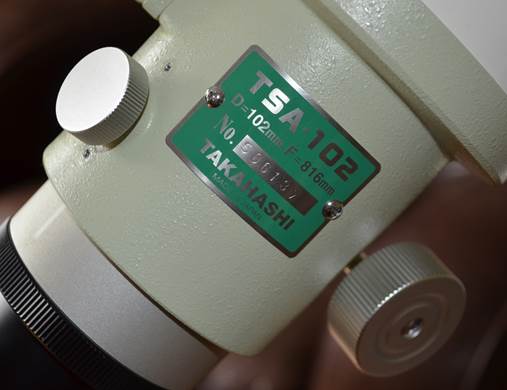
This
Takahashi has an aperture of 102mm, a focal length of 816mm and so an f-ratio
of 816/102=F8
Aperture
By far the most quoted
‘number’ for a telescope is the ‘aperture’. This is simply the clear diameter
of the main lens or mirror (crudely, the size of the hole where the light comes
in).
(Almost) all amateur telescopes fall in the
range 50-500mm (2-20 inches) in aperture. The light-gathering power of a
telescope increases with the square of its aperture; so do its size and weight.
A 2 inch aperture telescope will fit in the palm of your hand. A 20 inch
telescope may not fit in an observatory the size of your house.
Focal Length
The other number you’ll often see quoted is
the ‘focal length’. This number is the distance at which the main lens or mirror
brings the image to a focus. A longer focal length doesn’t mean a dimmer image,
contrary to popular belief, but it does reduce the maximum field width (the
area of sky that fits in the view).
A longer focal length also means higher
magnification for a given eyepiece. So long focal length scopes may be good for
the Moon and planets and double stars, but not so good for viewing or imaging
big star clusters and extended nebulae.
For some
types of telescope (refractors and Newtonian reflectors) the focal length is
close to the physical length of the tube. Other types have a folded optical
design so the tube is much shorter than the focal length.
Focal Ratio
The focal ratio is the focal length divided by
the aperture. This may be expressed (confusingly) as aperture/focal length
(e.g. 105/650) or a single number (105/650 is a focal ratio of 6.2, or roughly
F6). Focal ratios commonly fall in the range from 5 to 20. This is exactly the
same f-number as for a camera lens, which is just a specialised telescope,
after all.
Longer focal length telescopes are
photographically ‘slower’ – the camera shutter needs to be open longer to
record an image at the same ISO value. Again, this is the same as for a camera
lens.
It is harder to make a telescope which performs close to its theoretical
limits with a smaller focal ratio due to the steeper curves on the optical
surfaces. For this reason, short focal length telescopes are often more
expensive for a given type. Put another way, you are more likely to get good optics in a cheap scope if it has a
medium to long focal ratio.
However, shorter focal ratios make
the ‘scope more compact for its aperture and give a wider field of view. Like
most things it’s a compromise. For general purpose use, a medium ratio will
probably be best – F6 to F8.
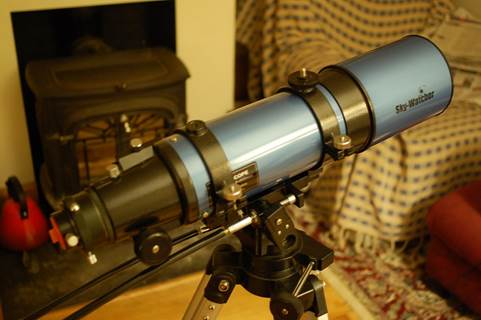
Types of Telescope -
Refractors
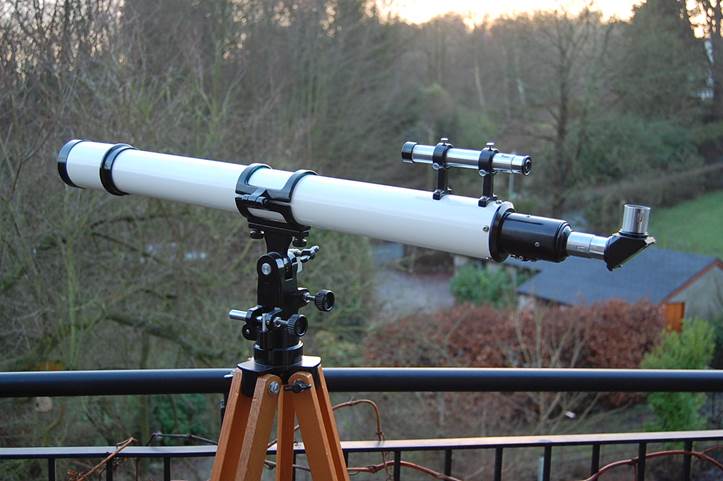
A classic small
refractor: Unitron 60mm
Just who invented the telescope is in doubt,
but the earliest astronomer credited as using one was Galileo. The type of
telescope Galileo used was a ‘refractor’, as were all early telescopes. Refractors
use only lenses, not mirrors.
Refractors vary in their detailed design (the
type Galileo used performs poorly and isn’t produced now), but all use a lens
at the front to gather light and focus it, another at the back to magnify the
image (the eyepiece).
A typical refractor is a long thin tube which
you look in the end of - what most people think of when they hear the word
‘telescope’.
Achromats and Apochromats
I need to go into a bit of technical detail
here to describe the major types of refractor and their differences.
Much of the fuss and buzz around modern
refractor design is about something called false colour (‘chromatic aberration’
in technical terms). Ever noticed a halo of purple or green around brightly
highlighted things in your photos? That’s false colour. All but the most
sophisticated (and expensive) refractors produce some level of false colour
around bright objects. The bigger the telescope objective
lens, the worse the effect (for a given design).
False colour happens because the objective
lens doesn’t bring all wavelengths of light to the same focal point. Mirrors
don’t have this problem. For visual use, how much this affects you may be a
personal thing – some people can ignore it, others can’t. However, it definitely
spoils astro-photographs.
So do all refractors have this problem? Yes
and no. Refractors (modern ones) come in two different basic types –
‘achromatic’ and ‘apochromatic’, though the distinction is a little fuzzy. As a
rule of thumb, achromatic refractors (‘achromats’)
show some false colour, apochromatic ones (‘apochromats’)
don’t. As you’ve guessed, apochromats –commonly
termed APOs - use some fancy optical technology and are often much more
expensive.
Achromats have a pair of lenses combined to make the
objective (‘a doublet’) made from normal glass. True apochromats
may have three lenses (a triplet) or more, or use special materials for the
lens (such as the mineral fluorite – not a glass at all), or both. Apochromats (‘APOs’) are more expensive than achromats simply because the lenses are more complex and/or
use more expensive materials; semi-apochromats lie
somewhere in between in both price and the level or false colour they show.
Do I need an
APO?
The answer will depend on what you want the
telescope to do, how much you’re willing to spend and, critically, how portable
you need the telescope to be.
So what does portability have to do with false
colour? All achromats produce some false colour, but
longer focal lengths produce less for a given aperture. Achromats
longer than about F15 show very little false colour. The problem is that at F15
even the smallest aperture refractors will be a metre or more long. Try carrying
that on board or on the Tube!
So … if you’re not bothered about portability,
or only want to use lowish powers (say for gazing at
star fields and big nebulae), an achromat is fine. But if you want a really
compact and portable, high performance refractor it’s going to have to be an
APO.
Refractor
Pros and Cons
Refractors in general have a number of
advantages and disadvantages compared with other types:
Pros:
1)
For a given aperture and
optical quality, refractors give the best performance because they have no
central mirror to degrade the image. This is especially true of subtle contrast
on planets.
2)
Treated kindly, a
refractor should last a lifetime without significant maintenance.
3)
In smaller sizes,
quality refractors give pin-point wide-field views and images of star fields
which reflectors generally cannot match.
4)
For visual use, refractors
tend to work better than reflectors in poor seeing conditions.
Cons:
1)
False Colour.
2)
Size and weight. As the
aperture increases, refractors rapidly become unmanageably large and heavy.
This is because most refractors do not have a folded optical design and so are
long and because big lenses have to be much thicker and heavier than similar
size mirrors. The result? A typical 10 inch reflector is still quite portable;
a typical ten inch refractor will be a big instrument needing a permanent
observatory.
3)
Cost. The difficulty of
producing big lenses means that the cost of refractors (especially APOs) goes
up much more steeply with aperture than for reflectors. For comparison, you can
currently buy a 16” Dobsonian reflector for
£1000-£2000; the lens alone for a 16” APO would run about half a million.
In my opinion, refractors make most sense in small to medium sizes where
they can make very easy-to-use, versatile instruments which give lovely images
and perform well even in mediocre seeing conditions. If you get aperture fever and must have a really big telescope (to
gather as much light as possible for imaging faint galaxies, for example) it’s going
to have to be another type, unless you are seriously wealthy.
Types of Telescope -
Reflectors
A true reflector uses
only mirrors. This one is a type of Cassegrain.
Reflectors are telescopes that use only
mirrors to collect light and focus it - a lens only comes into the equation at
the eyepiece.
Reflecting telescopes were formally invented
by the physicist Isaac Newton, but may have been known about (in theory at
least) for a thousand years before.
Reflectors now make up the vast majority of
professional instruments, including Hubble. The reason for the popularity of
reflectors among professionals is that above about one metre in diameter lenses
become too thick and heavy to be practical.
Even at relatively modest sizes, reflectors
are much simpler, lighter and cheaper than any other type. If you think that
‘simple light and cheap’ means poor quality, you’d be absolutely wrong. On the
other hand, if you think it makes them the best choice for all situations,
you’d be wrong too.
The Newtonian
The simplest type of reflector is the
original, the Newtonian. In this design, a single parabolic mirror at the
bottom end, supported in an adjustable ‘cell’, focuses light onto a small flat
mirror suspended in the centre at the other end in a device with legs to attach
it to the tube, called a ‘spider’. The secondary mirror just tilts the light
through 90 degrees out to the focuser and eyepiece.
In the middle of last century, by far the
commonest type of telescope in amateur astronomy was the Newtonian. More
recently, almost all ‘Dobsonians’ – a very popular
type of amateur telescope – have been Newtonians. Newtonians have just one
curved optical surface and so are fairly simple (for which read “cheap”) to
make well and can give superb images.
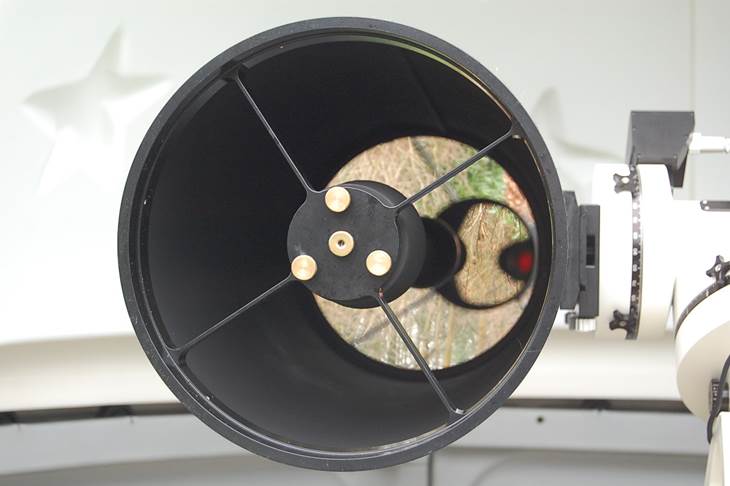
The Cassegrain
The other major type of reflector is the Cassegrain. Cassegrains have a
folded optical design and so tend to be much more compact than Newtonians.
In a Cassegrain, the
secondary mirror is curved and reflects the light straight back down and out
through a hole in the main mirror, instead of sideways. Cassegrains
are no better optically than Newtonians and often have a more highly curved
field of view, but they are crucially much shorter and so easier to mount. They
are easier to use too, because you look in the end instead of the side.
Pure Cassegrains have just two mirrors and are
usually one of three types that differ in the sort of curves their mirrors use
(and so in the way they perform): Classical, Dall-Kirkham and Ritchie-Chretien.
Classical Cassegrains have quite wide, if
somewhat curved (not so good for astrophotography) fields, with good sharpness
for planetary work. These used to be a common type in older professional
telescopes, such as the famous 100” at Mount Wilson and the 200” on Mount
Palomar. Sadly, Classical Cassegrains are rare these
days, perhaps because the secondary uses a type of curve – a hyperbola – that is
hard to make.
Dall Kirkhams are a type of Cassegrain that are easier to make and can give very high
resolution views for planetary work. The problem with this type is that they
usually have a long focal length and narrow usable field (not so good for deep
sky and astrophotography). Takahashi’s “Mewlon” range
is of this design.
The Ritchey-Chretien is the professional’s
design of choice for almost all large telescopes (Hubble included) but is the
hardest to make (both mirrors are hyperbolic). The RC can have a short focal
length and a wide field – ideal for astrophotography. BUT, before you rush out
and buy one, you should understand that professionals never look through their
telescopes! RCs often have a very large secondary mirror which seriously
degrades the image for visual use (especially at high powers on planets). Think
of the RC as a huge camera lens.
Reflector
Pros and Cons
Some people will swear that reflectors are
best. Others will prefer refractors. In truth, both types have their advantages
and disadvantages:
Pros:
1)
Reflectors do not suffer
from false colour.
2)
Reflectors are cheaper
for a given size than refractors.
3)
Newtonian reflectors in
particular can be cheap and easy to make well.
4)
Cassegrains are compact and lighter weight than catadioptrics
of the same aperture.
Cons:
1)
All reflectors need
periodic collimation (adjustment of the mirrors).
2)
Reflectors often need
their mirror(s) re-coating after somewhere between five and thirty years.
3)
The unfolded light path of
a Newtonian means that larger aperture Newtonians either end up being very long
and unwieldy, or of very short focal-length (which can introduce distortions
into the image).
4)
The eyepiece of a
Newtonian can end up in some very awkward positions if the instrument is
mounted equatorially because it’s on the side at the top.
5)
Cassegrains are expensive to make (though still less than refractors).
6)
Classical and Dall
Kirkham Cassegrains have a long focal length and so a
small field of view.
Types of Telescope - Catadioptrics
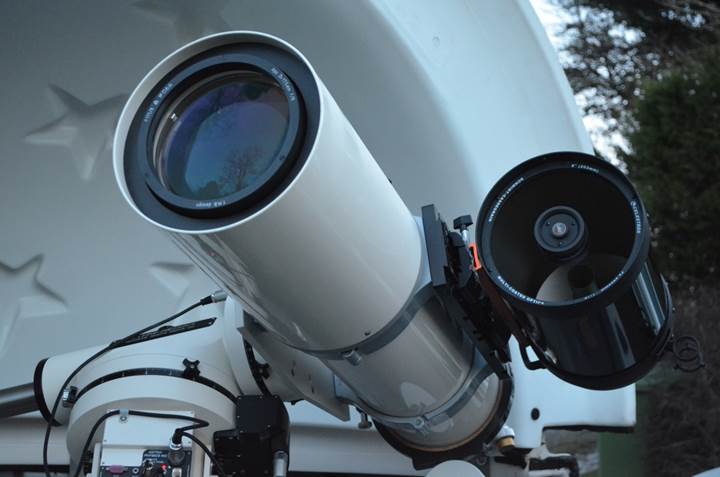
A compact catadioptric on the right mounted on a (slightly smaller
aperture) refractor.
This mouthful-of-a-name has nothing to do with
eye-wear for felines, but encompasses all telescopes which use a combination of mirrors and lenses.
Usually they are a variation on the Cassegrain, but
Newtonian types exist as well.
You will find several types of catadioptric on sale. Most common is the Schmidt Cassegrain (or SCT) made popular by Meade and Celestron in the 1970s, followed by the Maksutov.
Catadioptrics are common amateur telescopes because they aren’t too expensive to
make, do most things quite well and are very compact for their aperture.
The Schmidt-Cassegrain (‘SCT’) has a
full-width glass plate (not exactly a lens) of special design at the front to that
can allow a flatter wider field than a pure Cassegrain.
The SCT is a much criticised design, but in fact its characteristics can be
good – a fairly wide and flat field, moderate focal ratio (usually 10) and
short tube length. People will often quote the largish (30-35%) central mirror
as a problem, but this isn’t really the main issue. The problem with SCTs is
that some older ones were below-par optically. The recent Chinese ones I have
seen have been good.
The Maksutov has a thick, curved corrector at
the front with the secondary mirror a silvered spot on the back of the
corrector, though some have a separate secondary, like an SCT. Mak’s tend to be of longer focal ratio than the SCT, but
have smaller central mirrors, which is a good thing. The best Maksutovs can be superb planetary instruments, but are
heavy, expensive and slow to cool.
Many variations on the catadioptric exist, such as sub-aperture Maksutov which has a small corrector behind the secondary
mirror. These designs are typically hard to make well, so beware!
Catadioptric Pros
and Cons
Pros:
1)
Catadioptrics can have a wider corrected field than some pure Cassegrains.
2)
Some catadioptric
designs use simple curves on their lenses and mirrors and so are cheaper to
make than refractors or classical Cassegrains.
3)
Because they are
semi-sealed, catadioptrics need less cleaning and
re-coating of their mirrors.
4)
Catadioptrics can be very compact at long focal lengths and so can make great
planetary telescopes.
5)
Catadioptrics are widely available in range of types and sizes.
Cons:
1)
Catadioptrics have a longer focal length and so smaller field of view than most
refractors and Newtonians of the same aperture.
2)
Catadioptrics suffer from minor false colour, similar to an APO refractor and more
than any reflector.
3)
Catadioptrics tend to be heavier than reflectors, due to that big corrector up front.
4)
Because they contain a
lot of glass and have a semi-sealed tube, catadioptrics
are slow to cool. This doesn’t matter much for small sizes, but can be a big
problem with large ones!
5)
Corrector plates tend to
dew-up quickly on cold nights.
6)
Catadioptrics often have large central mirrors which reduce their performance a bit
and make them more affected by bad seeing (atmospheric turbulence on cold
nights).
Types of Telescope -
Spotting Scopes
Spotting scopes are compact, rugged
telescopes, usually refractors, designed for terrestrial viewing (birdwatching,
target shooting etc). They are designed to fit on
photo tripods with panning heads and have an integral ¼-20 thread for mounting.
Many spotting scopes are shock proof and water
resistant, simple in use and give an upright image, like bino’s.
So what’s the catch?
There are a number of potential problems with
using spotting scopes for astronomy:
1)
Optical quality may not
be good enough for astronomical use.
2)
Spotting scopes have
prisms to provide an upright image. Fine for daylight use, prisms can give dim,
or even smeared and fuzzy images on astronomical objects.
3)
‘Standard’ astro’ (0.965, 1.25, 2.00 inch) eyepieces don’t fit in many
cases.
4)
Most spotters have a
maximum magnification of around 65x. This is too low
for some astronomical purposes (double star, lunar, planetary).
5)
Spotting scopes are
usually too small (60-70mm) for other than quick-look astronomy.
Unless you really want it for serious birding as well, avoid spotters
for astronomy. If you buy, go for a premium make such as
Leica, Nikon Swarovski and Zeiss. I’ve seen cheap spotters that are fine for
birding but completely useless for astronomy because their optics aren’t good enough.
Specialist
Telescopes
Amateur astronomy has
many different branches and as a beginner you may not really know which one(s)
interest you. The Moon? Planets?
Double stars? Deep sky imaging?
Solar system imaging? The Sun?
Supernova hunting? Asteroid
tracking? The list goes on …
You can buy more or
less specialist gear to cater for all these interests. But know that in some
cases what you end up with won’t do much else. For example, some specialist
imaging ‘scopes can’t be used visually (or work very badly for it). Specialist
solar telescopes often can’t be used on the night sky at all.
You could try using
other people’s gear to find out what type of astronomy interests you then buy a
specialist ‘scope to suit. But be careful! I have a friend who was blown away
by the views of Saturn he got through a huge Dobsonian
at an Arizona star party. But here’s the thing – he didn’t have to transport
it, set it up and collimate it; and he didn’t live in Arizona with its dark
skies and superb seeing. I guarantee if he’d bought a similar ‘scope over here
as a beginner he would never have used it.
If you are new to the hobby it’s best to start
with a modest, easy-to-use all-round telescope system that works for different
types of observing or imaging as your interest grows and changes. Don’t buy a
specialist telescope before you have some experience!
Scopes for Children and
Teenagers
This is hard. I got this one wrong (twice) by
trying to get something too cheap. Most toy scopes will turn them off for life
– put that EduToys telescope back in the rack at the
toy store!!
Children and teens need a simple, rugged
telescope which is easy to use but actually shows them something interesting. The
advice on choosing all applies, but portability and ease-of-use are even more
vital.
A good idea is to learn to use the telescope
yourself first so you can guide them (i.e. help find things). If you’ve never
done it before, this will be harder than you think!
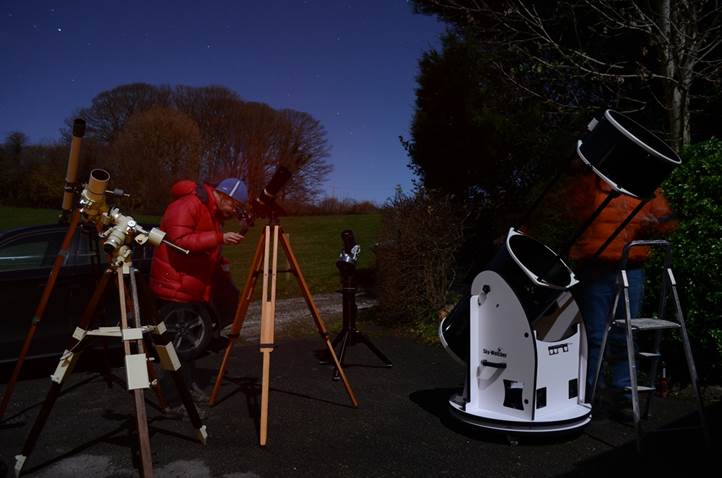
Mounts
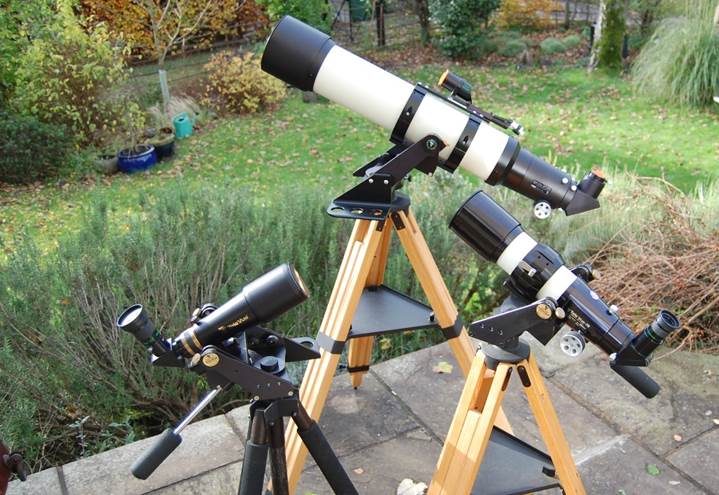
A
selection of TeleVue refractors on simple push-pull
alt-az mounts.
The mount is just as
vital to a good view or photograph as the telescope itself. Why? Good question.
1)
Mounts for
astronomical telescopes have a rather different job to do than those for
terrestrial telescopes. The reason is that terrestrial targets either stay
still or move unpredictably (think scenery and wildlife). Meanwhile, all
objects in the night sky appear to move as the Earth turns. To keep what you
are looking at (or imaging) in view, the mount will need to continually track
the object in some way, even if you move the telescope yourself.
2)
Astronomical
telescopes typically need a wider range of movement than terrestrial ‘scopes –
all the way from horizon to zenith (horizontal to vertical) in fact.
3)
Astronomical
‘scopes can operate at much higher magnifications than most terrestrial
telescope and so they need steadier (for which read heavier and sturdier)
mounts and tripods.
For all these reasons, tripods and heads
designed for spotting scopes or cameras (pan-tilt heads, ball heads etc) only work with the smallest astronomical telescopes.
Mounts for astro’ ‘scopes come in a vast range of sizes and prices,
but there are really only two types:
Alt-Azimuth
Mounts
Alt-az mounts are generally the simplest type because they move
only up and down (in altitude and azimuth). In some cases you just push the
telescope around to find and ytrack things, which is
intuitive, but can be frustrating at higher magnifications, when it’s all too
easy to push too far and lose your object altogether.
Some more
sophisticated alt-az mounts have slow motion controls
so you can adjust them in small increments.
It may surprise you to
learn that alt-az mounts can feature electronics
which find and track objects for you (so-called ‘GOTO’ because you get the mount
to ‘go to’ a particular object or location). But for beginners, the simpler
type with manual controls is best.
The Dobsonian offers
a cunning way of exploiting the simplicity and performance of a large Newtonian
on an alt-az mount. Dobs are simple, portable and
cheap for their aperture and offer the best way to own a big telescope.
However, Dobsonians don’t usually track and the
bigger ones may need a step ladder to reach the eyepiece.
Equatorial
Mounts
Equatorial mounts are
designed so that you only have to move one axis to track an object as the Earth
turns. In practice this means that one of the axes (termed the Right Ascension
or RA axis) is aligned with the Earth’s axis, often by aiming it at the Pole
star. The other axis, the Declination or ‘DEC’ axis, is at right angles to the
RA axis. In practice neither of the axes on an equatorial mount corresponds to
up and down (unless you live at the pole or the equator). This seems odd at
first, but comes into its own in use (honestly!) because to keep something in
view you only have to move the RA axis (as long as it’s properly aligned).
Many equatorials have
the RA axis driven by something rather like a clock mechanism to track objects
once you’ve found them. This is good for long-exposure photographs, but good
for viewing too because you don’t have to keep fiddling with the mount to keep
the object in view.
By far the most common
type of equatorial is the so-called German Equatorial Mount (GEM). A German mount
has the Telescope counterbalanced with weights across the RA axis.
The other type of
equatorial mount is the fork mount. In this case the telescope sits in a cradle
which rotates on the RA axis. Most big professional telescopes use fork mounts,
as do many Schmidt Cassegrains (SCTs) sold by the
likes of Meade and Celestron.
Because they are aligned with the sky as it appears to rotate, it’s much
easier to locate objects with an equatorial mount too. Sometimes this is done
with GOTO electronics, but can be done much more simply with dial gauges on
each axis called setting circles. You can simply look up the declination and
right ascension of an object in tables or an atlas, apply an RA correction for
the time and then move the mount to that position on the setting circles. You
just can’t do that with an alt-az mount unless a
computer is helping out by doing some complex calculations.
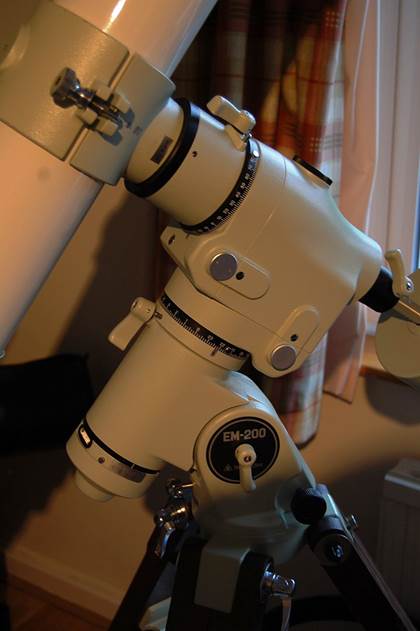
This
robust equatorial mount is smooth and stable, but heavy to move and fiddly to
align – not ideal for a beginner.
Things to Consider when Choosing
Consider
the following three factors:
Portability
A telescope setup you
can just pickup and carry will get used much more than one you have to lug in
bits!
If you only read one bit of advice on this entire
site, it’s this: Choose a first telescope that is easily portable as a complete
unit. Here’s why:
My first telescope was a little 3 inch
reflector on a simple alt-azimuth mount. It was light in weight, simple to
set-up and I used it all the time.
My second telescope was a long-focus 3 inch
refractor on an equatorial mount which was more complex to set-up; I used it
less.
My third telescope was a premium 8 inch
Newtonian reflector on a massive mount. Its images were superb, but I hardly
used it. Why? Because on most nights I didn’t have the time to lug it out in
pieces, assemble it, wait for it to cool, use it, and then finally disassemble
it and take it in again.
The biggest and best telescope available will show you nothing if you
don’t use it. Ask yourself how much you
will really use a telescope that takes hours to setup, cool and use.
Once every six months is not a love life and
it won’t make you an astronomer either.
So … don’t buy a refractor over four inches or
a reflector over six inches as your only
telescope unless you can answer ‘yes’ to at least two out of the following three questions:
1)
I have the space, cash
and willingness to build a permanent observatory for my telescope from day one.
2)
I have a leisurely
lifestyle with lots of time free from work and family commitments.
3)
I live in an area where
there are very frequent clear nights with good seeing, such as the desert
southwest of the U.S., southern Europe etc.
Ease of
Use
This GOTO system is easy to
use … when it’s setup and aligned (which can take ages)!
Once you’ve got it outside and set-up,
hopefully fairly quickly, you need a beginners’ ‘scope that’s easy to use. This
starts with finding stuff to look at or image.
You may be surprised how hard it is to find
things through a telescope, even easy things like the Moon! A long focal length
makes finding things much harder because (as you recall, don’t you?) it means a
smaller field of view. A smaller field of view also means objects drift out of
it more quickly as the Earth turns.
‘Ahhh,’ I hear you
say, ‘but doesn’t GOTO find things for you and then track them?’
Yes, in theory. The problem with most GOTO
mounts is that you need to get them aligned first. Again, this can be
surprisingly hard and often involves setting the ‘scope on a particular star or
stars (just the thing you’re trying to avoid!) that the computer asks for. If
you only have an hour of observing time, you may spend much of it aligning the
mount.
A
smallish telescope with a short focal length and a good finder (re-dot
varieties are best for beginners) on a simple mount will be easiest to use.
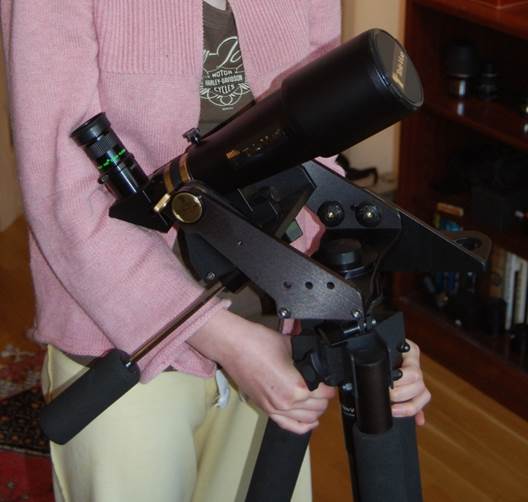
Quality
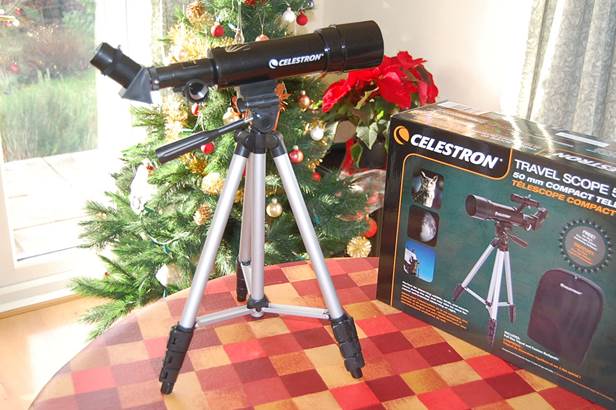
Lots
of small scopes like this 50mm Celestron are given as
presents, but the quality of some components is very poor.
The author of the cult classic “Zen and the
Art of Motorcycle Maintenance” – Robert Pirsig - went
mad when he came to believe that Quality was the most important thing in The Universe.
In terms of telescopes, he was pretty much right though.
Know this: telescopes which are poor mechanically and/or optically are a
disappointing pain-the-***.
Telescopes are a simple, mature technology,
but crummy ones are all too common. The problem, of course, is cost.
High-quality telescopes are expensive to make. You might think that optics are the only important quality issue, but unfortunately
that’s not true. Factors like a poor focuser or a badly baffled tube can be
almost as problematic; and that’s before we get to a wobbly mount …
So how to avoid a poor
telescope? The easy, rich-man’s way is to buy a complete
setup new from a mainstream manufacturer – Televue
and Takahashi are obvious premium choices, but higher-end Skywatchers,
Meades and Celestrons are
typically pretty good too. These may not offer the best value-for-money, but quality
is guaranteed and by buying a complete set you can be sure everything will work
together too. Trouble is you’ll need to bring thousands to the table for a
complete rig …
Cheaper ‘scopes from mainstream
makers like Meade, Celestron and Skywatcher
can be excellent too ... but not always (see the photo above). In general, avoid telescopes under 70mm aperture and/or £150 or so,
even from these makers.
So what about quality on a lower budget? Consider
the following points:
- Forget anything
that smacks of being a toy.
- Keep it
simple. Remember that basic mechanical and optical quality are MUCH (can I
shout that louder?) more important than electronic gizmos, such as GOTO.
- Know that a
simple achromatic refractor or Newtonian reflector on a basic altaz (up and down) mount will be much better for a
given price-point than a fancy Schmidt-Cassegrain,
APO, Maksutov etc.
- Consider
buying used from a specialist web-site (Astromart,
Astrobuysell). There are some surprising
bargains to be had from upgraders.
- Ebay can be
great, but only if you know what you’re doing. Don’t buy one of the flood of cheap new
unknown-brand scopes on Ebay.
- You Don’t
Need Naglers! Premium eyepieces have their
place, but a good telescope on a solid mount, but with simple eyepieces
will perform MUCH (I’m shouting again) better than a poor telescope with premium
eyepieces.
- You could make
your own (usually a Newtonian).
- Make sure
you allow for the accessories you need. A bare-bones ‘scope (called an
Optical Tube Assembly or OTA) comes without essentials like mount and
eyepieces.
Summary
Well-done for making it this far, even if you
skip read it! You should now know everything you need to go out and buy your
first astronomical telescope. It’s an exciting moment – enjoy it!
The main thing is to keep it simple and keep
it portable and go for optical and mechanical quality above size and features.
Don’t get bamboozled by glossy Hubble pics on the box and don’t buy something
too big and ambitious as a first ‘scope.
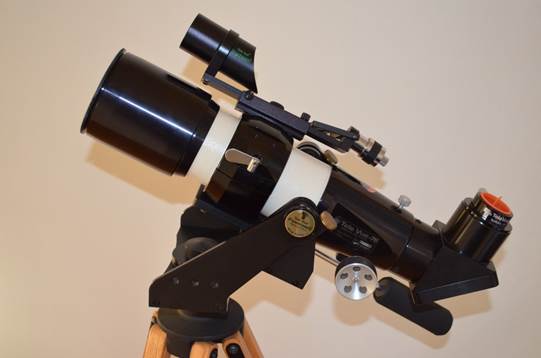
Which Telescope to Buy?
A small, short-focus
refractor on a simple alt-az mount makes a good
beginners’ ‘scope.
Ok, enough of the lecture, so what do I
recommend?
Many beginners buy Schimdt-Cassegrains
telescopes on GOTO mounts, but I don’t recommend it. It’s not that these aren’t
great telescopes – they often are – it’s just that factors like a long focal
length and so small field of view, along with a complicated mount that needs
aligning, can make them frustrating unless you have some experience already.
Instead, start off with a small portable refractor on
a simple alt-az mount that you can keep as a
quick-look, grab-n-go ‘scope to complement any bigger ‘scope you buy later on. Go for 70-100mm aperture, avoid focal lengths above about 600mm and buy
from a good make like SkyWatcher. If you’re loaded,
go ahead and buy a small Televue setup like this one –
you’ll love it.
A small TeleVue refractor with a red-dot finder on a simple alt-az mount: a near-perfect, but expensive, beginners’ setup.
If you want more performance from the outset,
especially for visual use on deep sky, a quality small-medium (say 4.5”-10”) Dobsonian is a great way to start. Again, SkyWatcher Dobs are great, but don’t bother with GOTO.
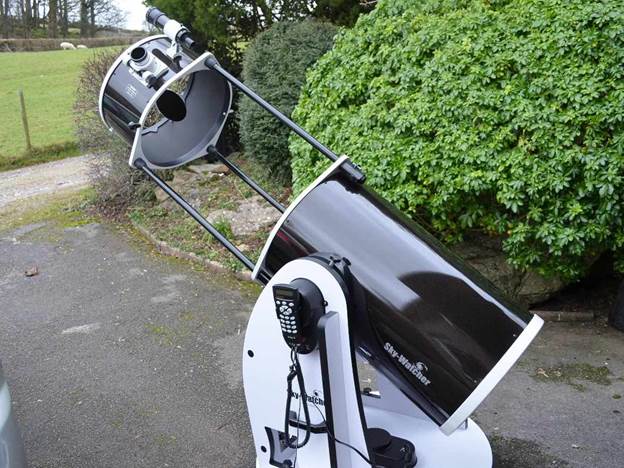
SkyWatcher SkyLiner Dobsonians have great optics and clever features, but
forget the GOTO.